Integration with ActiveCampaign
ActiveCampaign is a service for marketing automation, triggered email campaigns, funnels and CRM deal management. The main idea of the service is personalized messages based on the actions of website visitors. With the lead scoring and site/event tracking tools, you can personalize emails and create dynamic content. For the sales department, there is a CRM module in which the manager can make transactions and set tasks.
ApiWay has several integrations with ActiveCampaign.
And now we'll show you how to set up the integration between Facebook Leads and ActiveCampaign.
And now we'll show you how to set up the integration between Facebook Leads and ActiveCampaign.
To start working with Apiway.ai, you need to sign up.
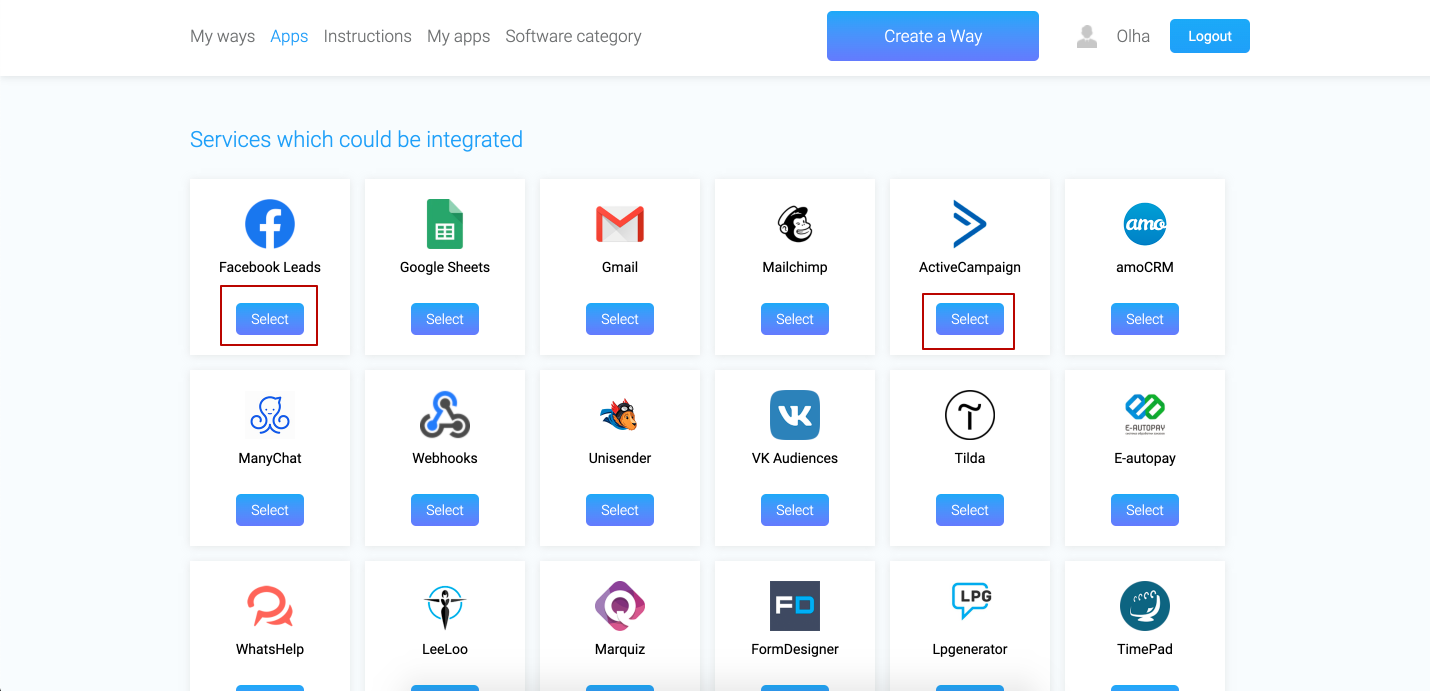
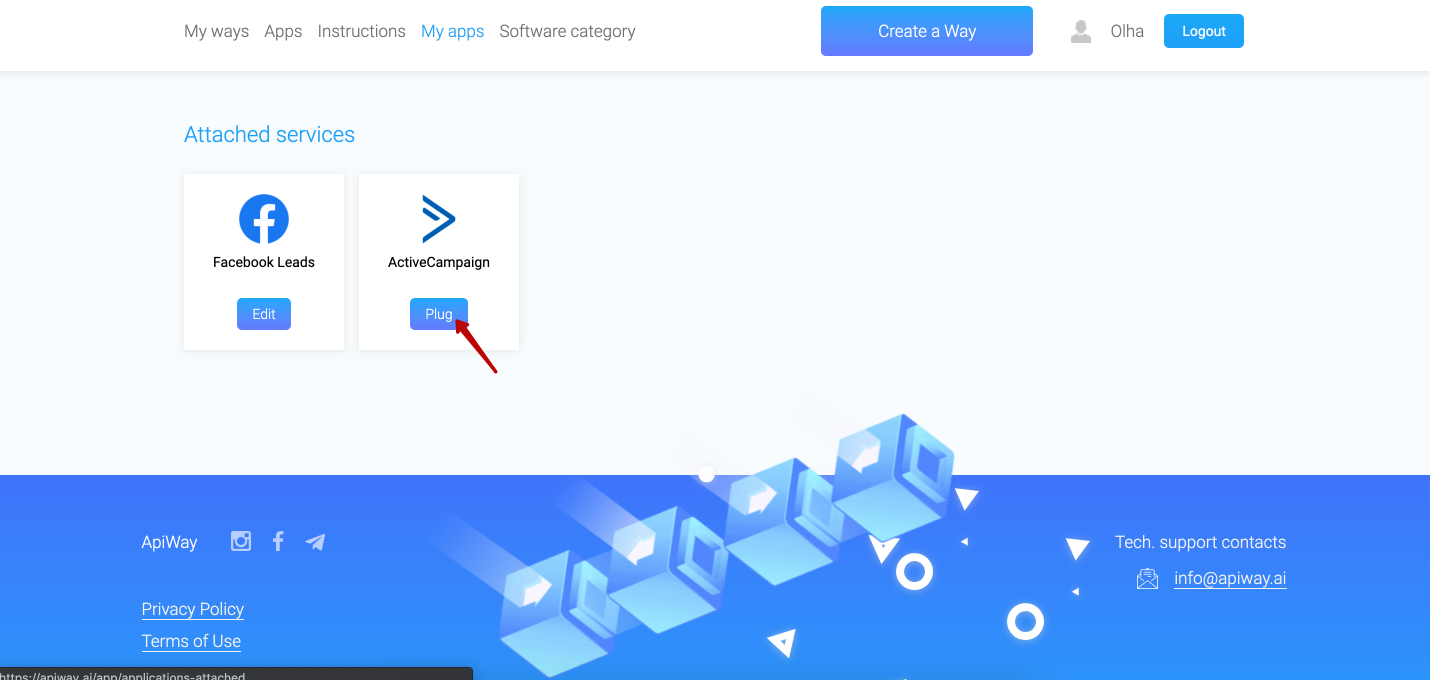
Step 1. Attach the necessary services
Go to the Apps section and select Facebook Leads and ActiveCampaign
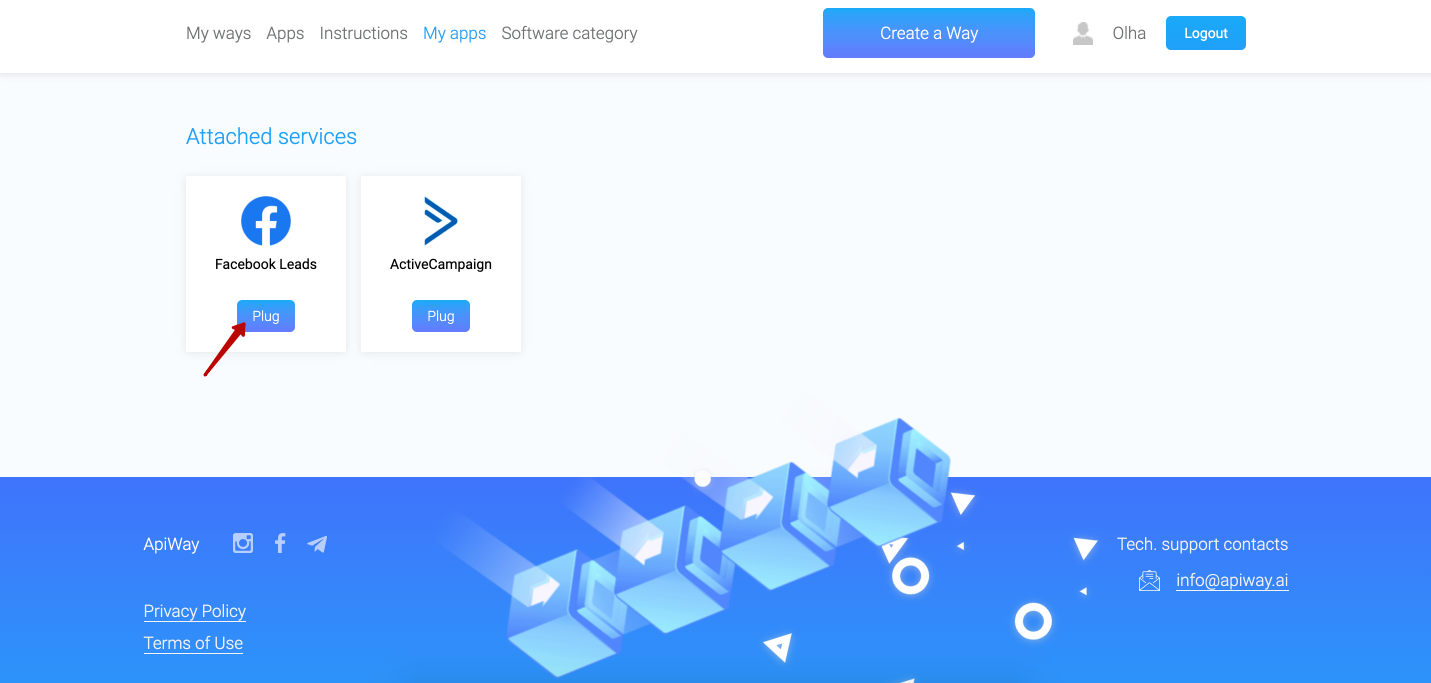
Then go to the My Apps tab and connect them.
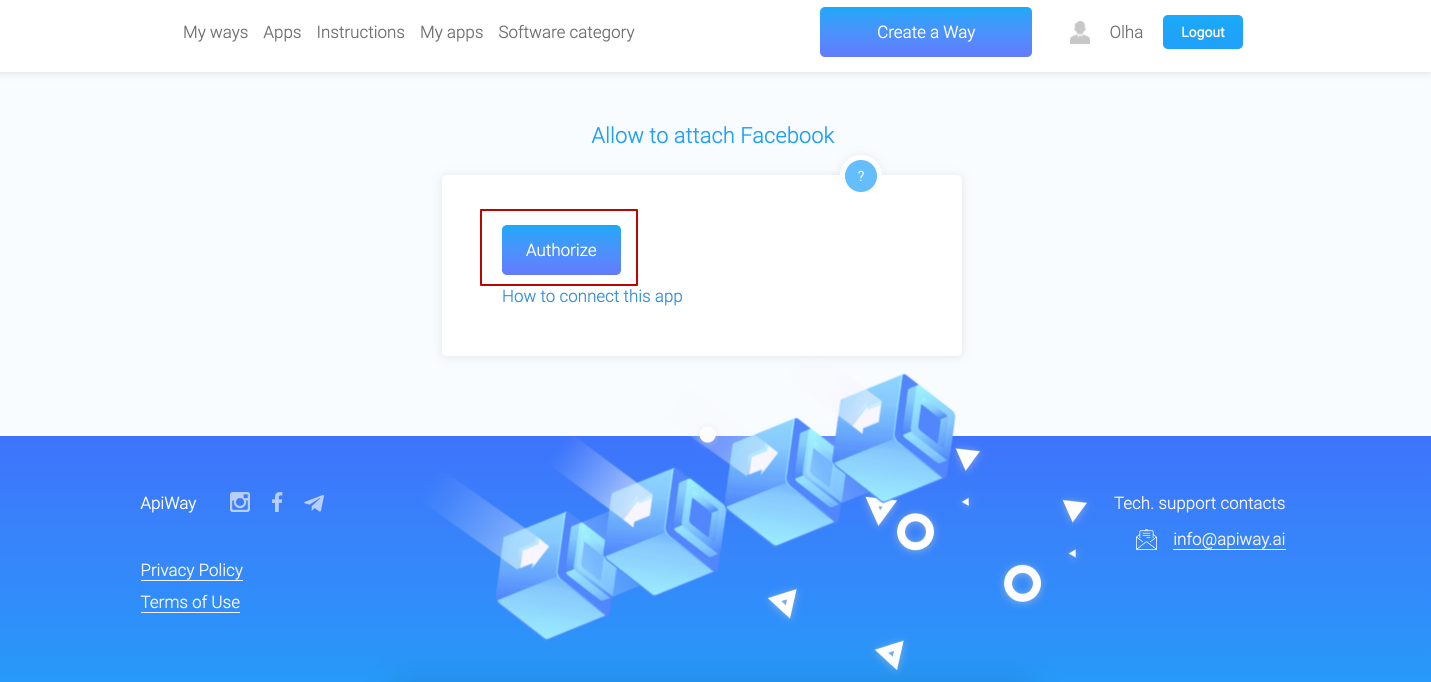
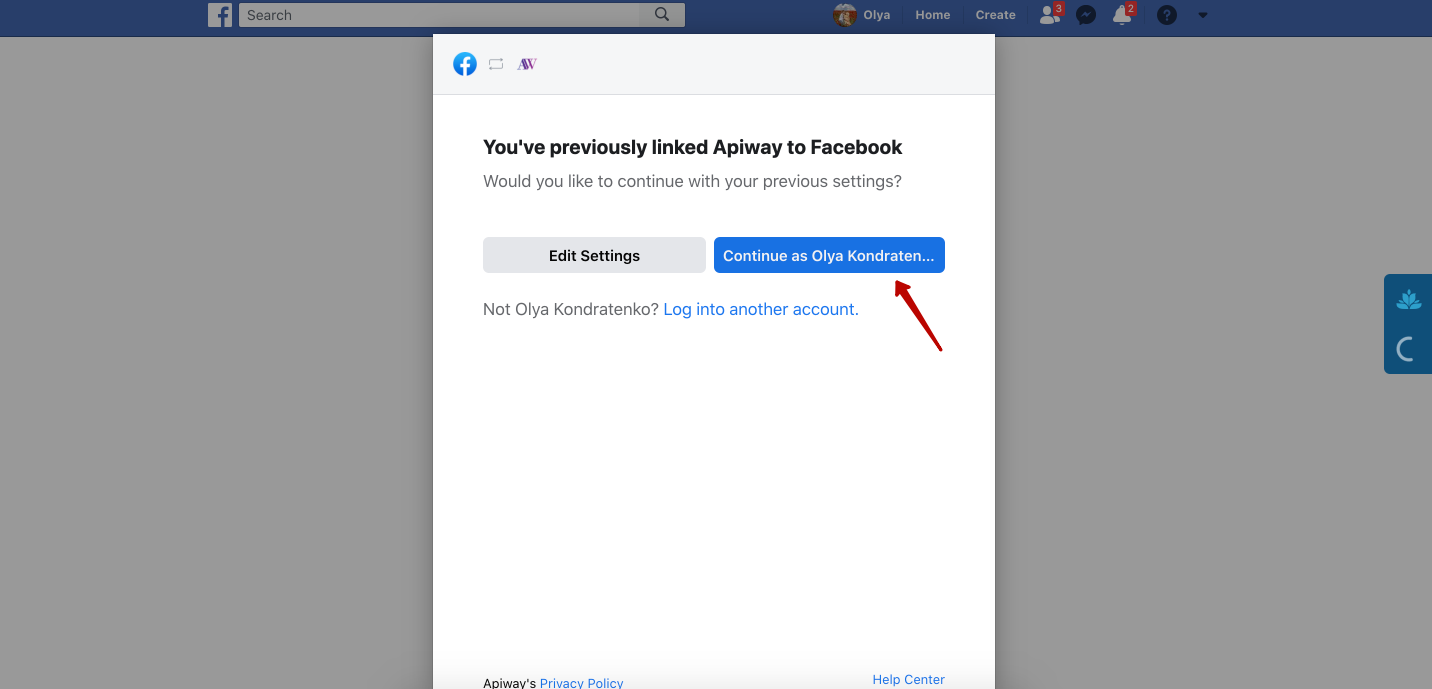
Let's start with Facebook Leads. Click the Plug button and log in your Facebook account.
Let's start with Facebook Leads. Click the Plug button and log in your Facebook account.
It's important that you should have access to the Facebook ads manager page in which the lead form is done.
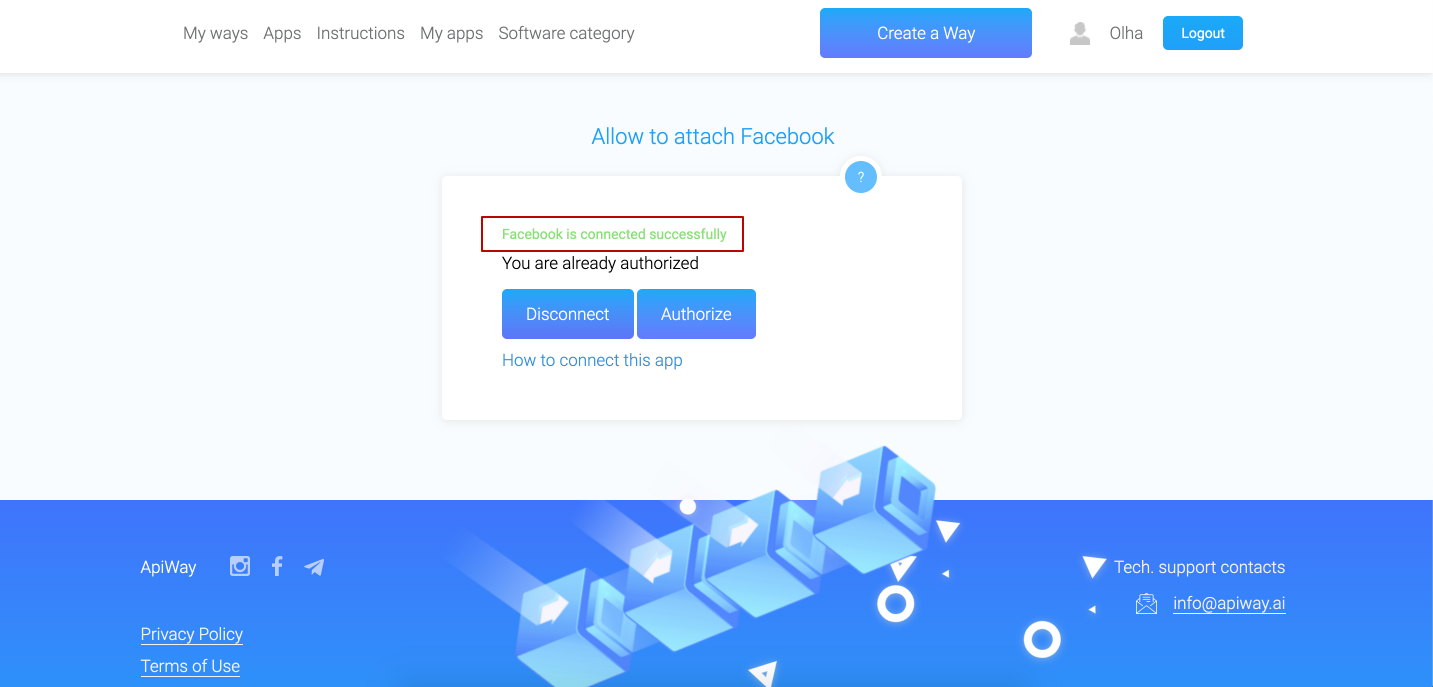
Facebook Leads is successfully connected. Now let's do the same for ActiveCampaign.
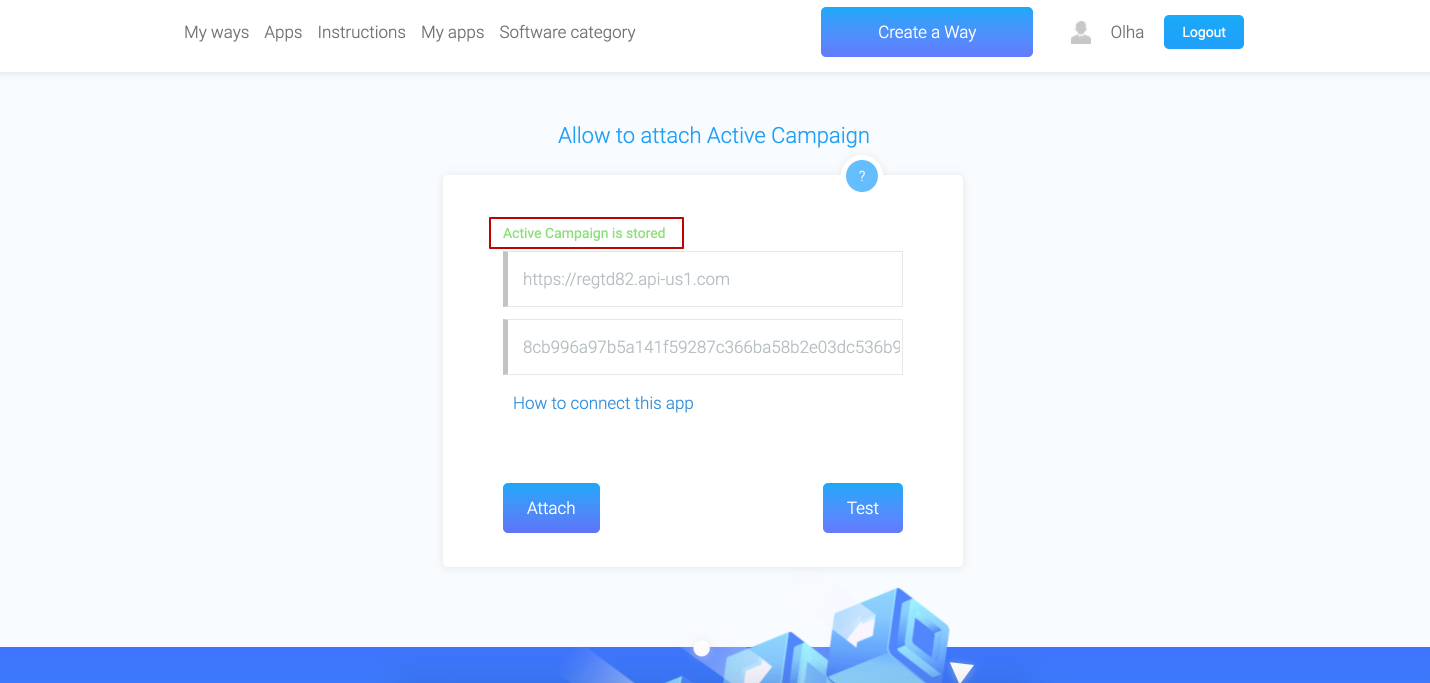
When you click the Plug button, you will see two fields: Api Url and Api Key.

You can find this information on the ActiveCampaign website. Go to the settings and click on the section "Developer". And here you see your Api Url and Api Key
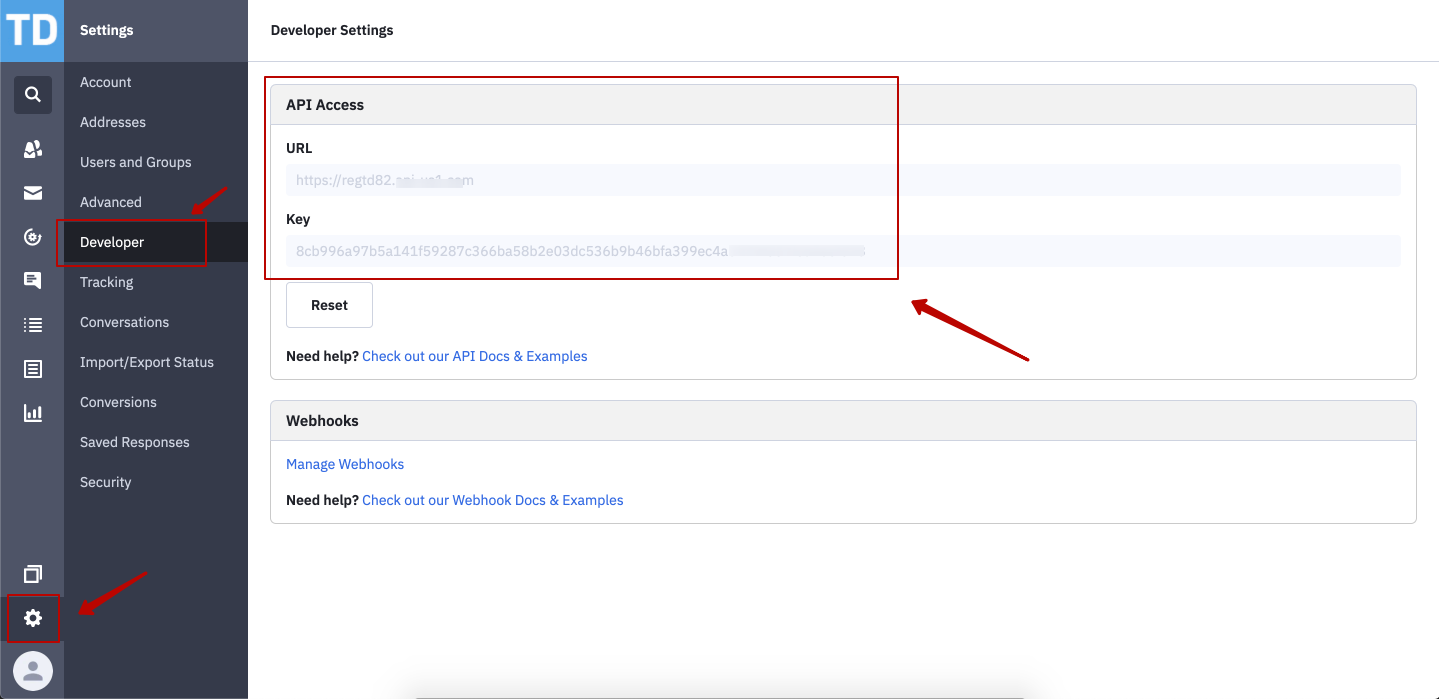
Copy them to the fiends on Apiway website and then click the button "Attach".
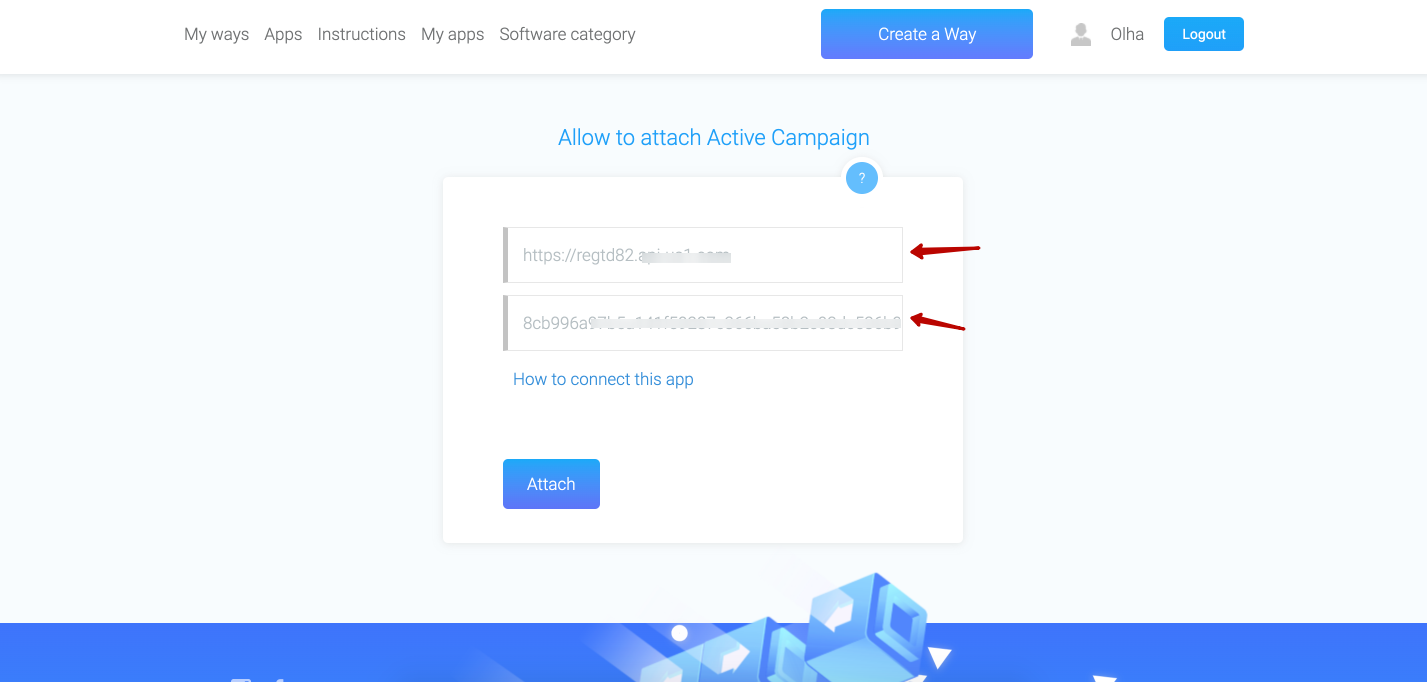
One moment and... and ActiveCampaign is connected.
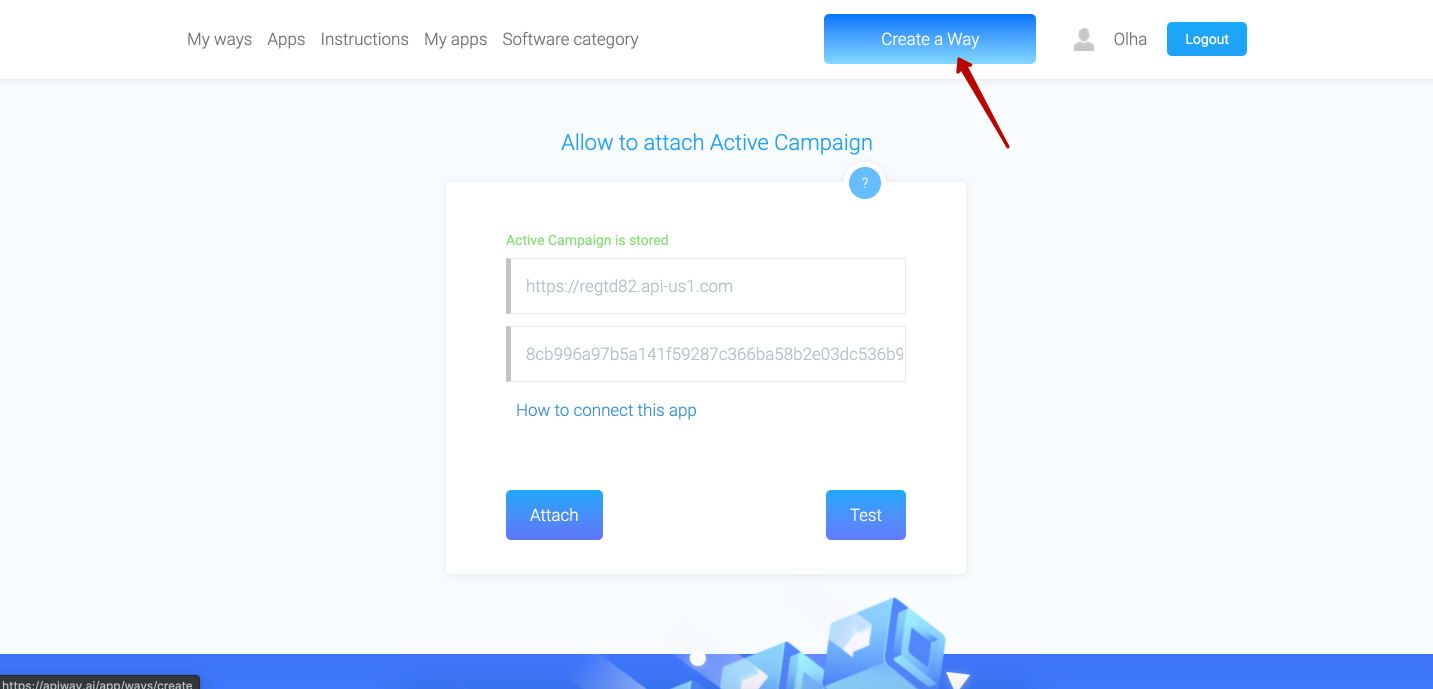
Now both services are connected, and you can start to configure the integration.
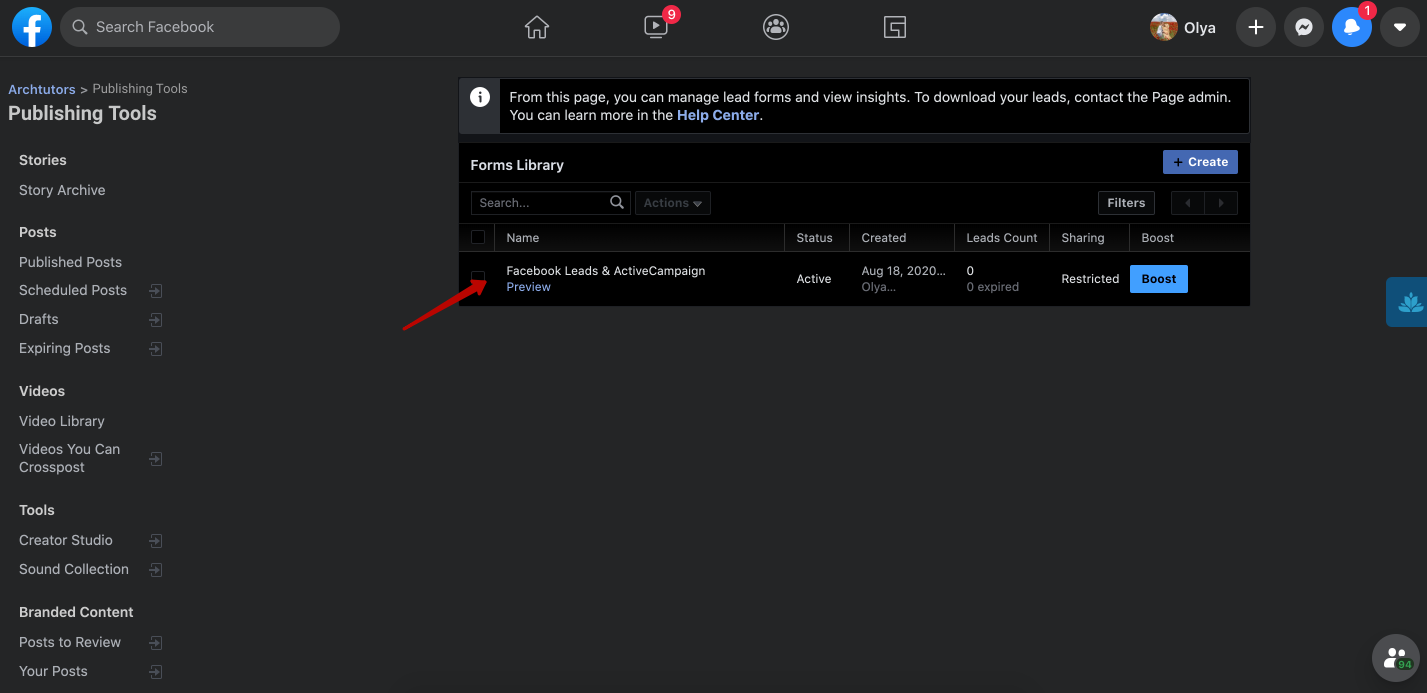
We have created a Lead form in advance.
We have created a Lead form in advance.
Step 2. Create integration
In the Apiway service, click Create a way.
First, let's rename our integration to make it easier to find it later.
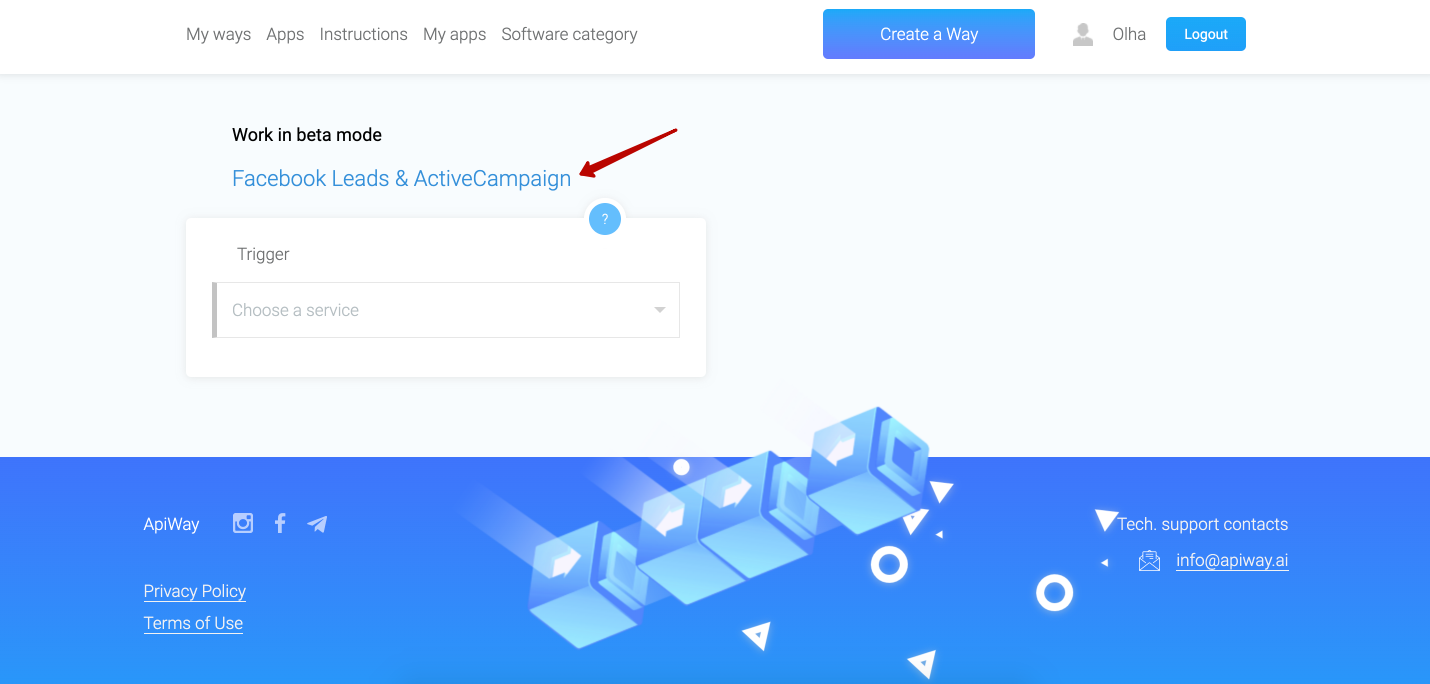
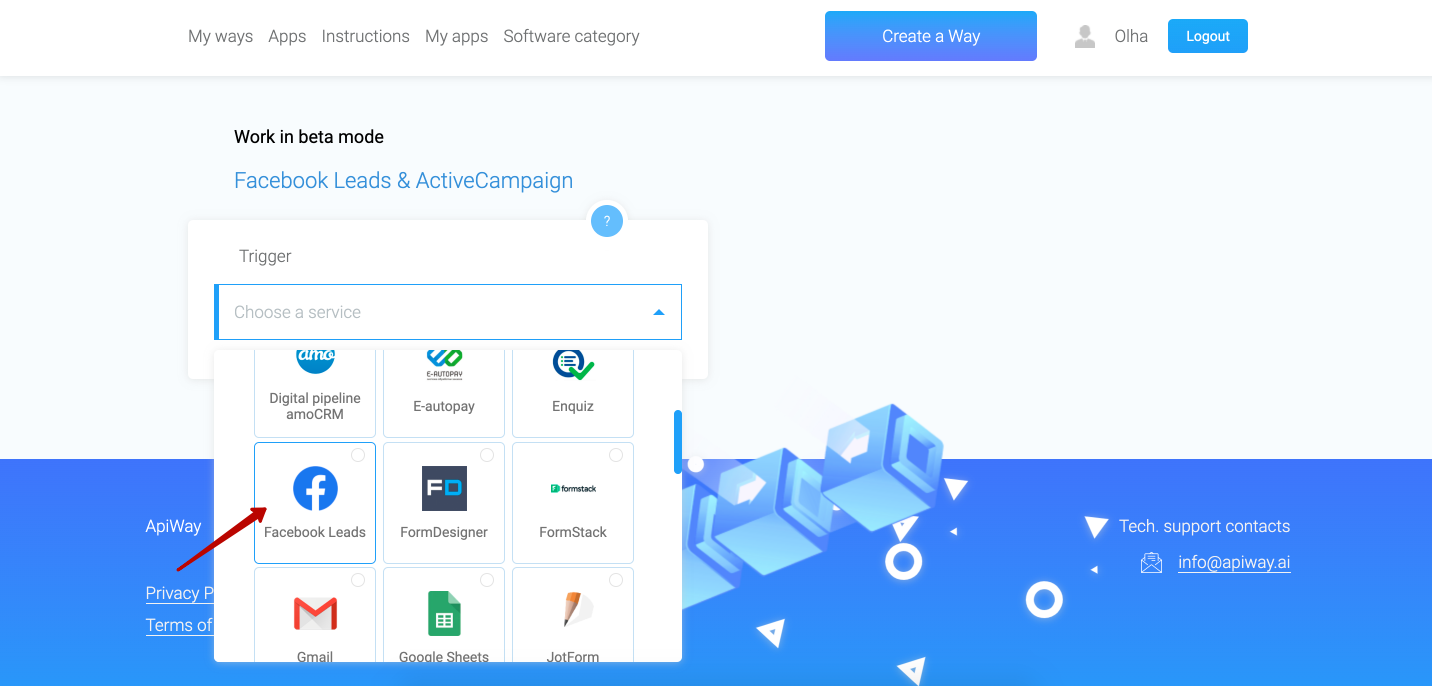
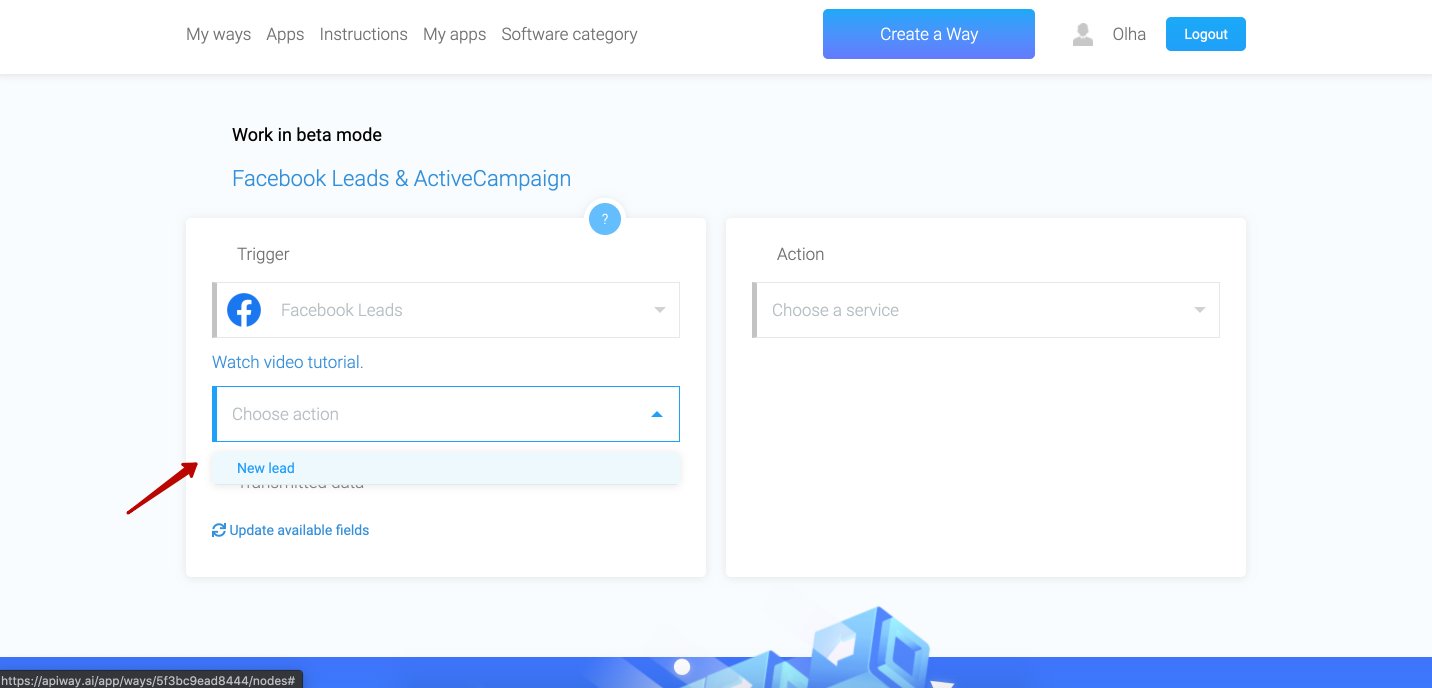
Next, select the trigger for our integration - Facebook Leads.
Choose an action - new lead.
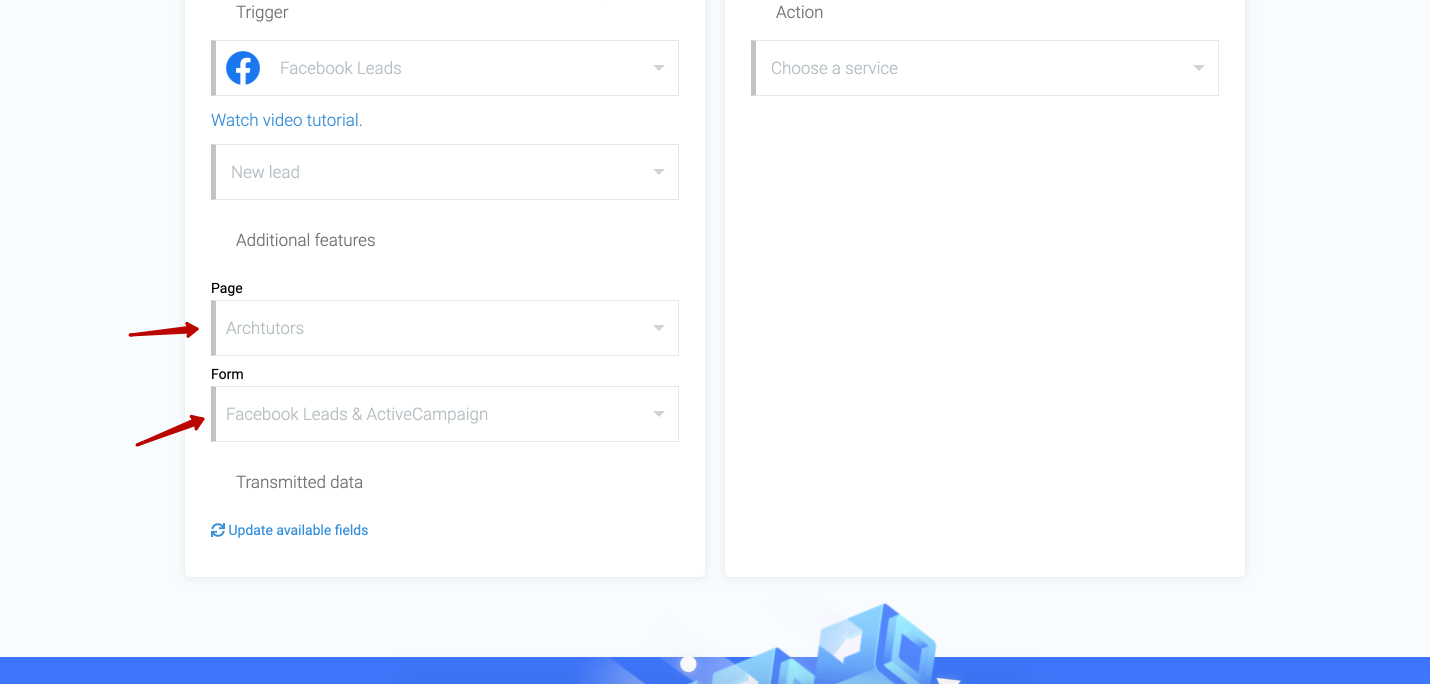
Then select page and lead form from the list.
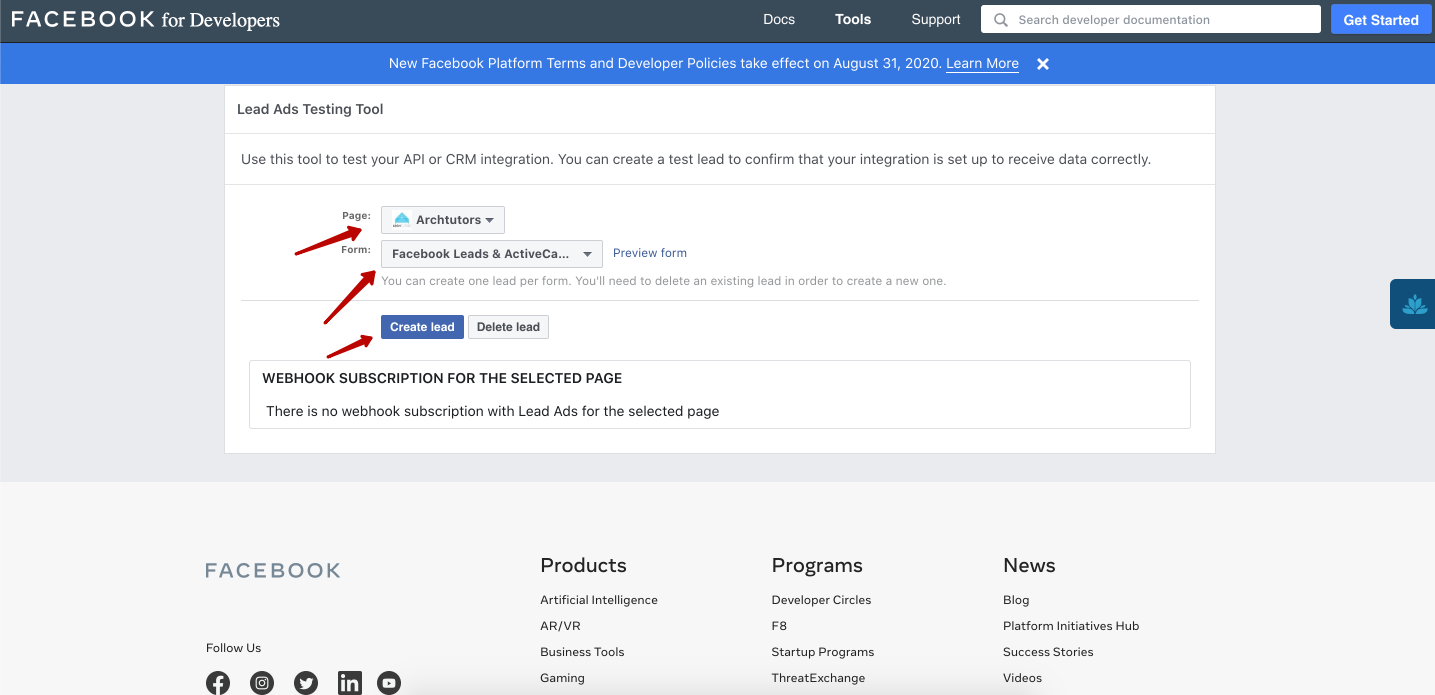
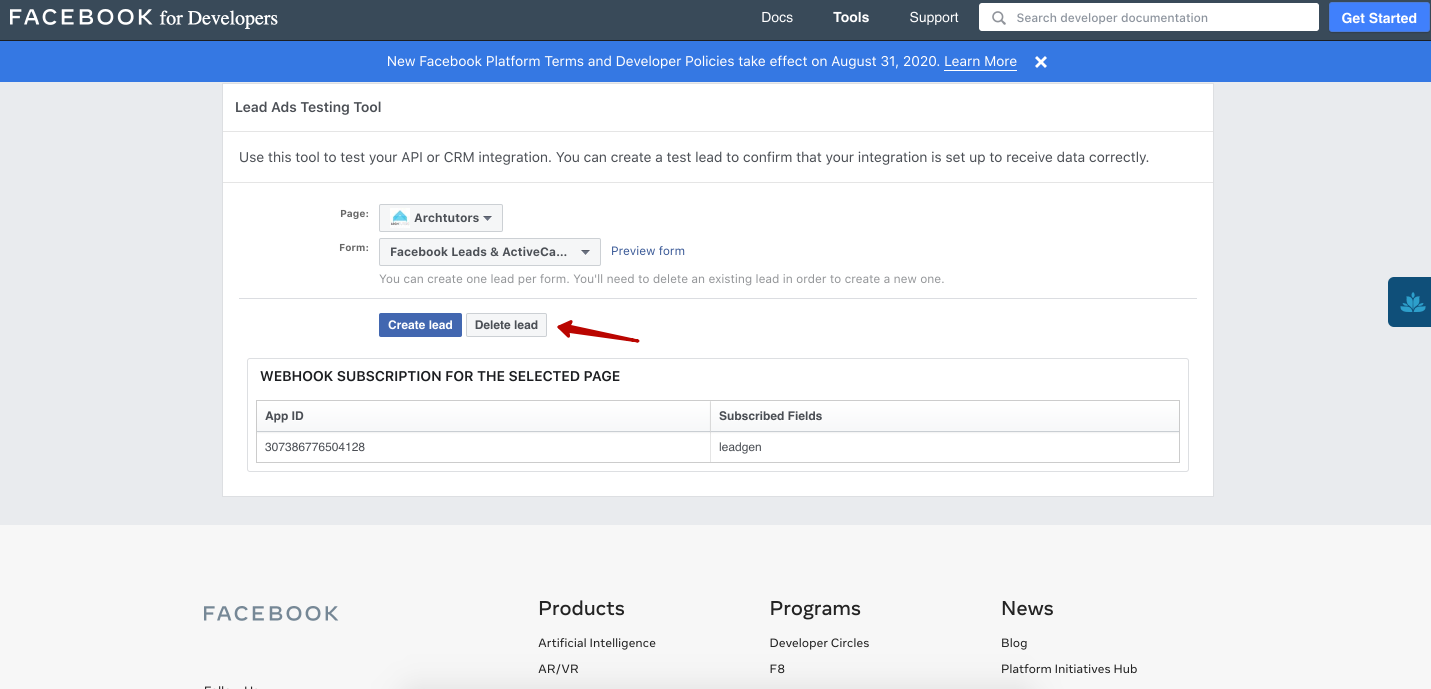
Now we need to find Facebook lead form testing tool
https://developers.facebook.com/tools/lead-ads-testing
Select a page, lead form and click "create lead".
https://developers.facebook.com/tools/lead-ads-testing
Select a page, lead form and click "create lead".
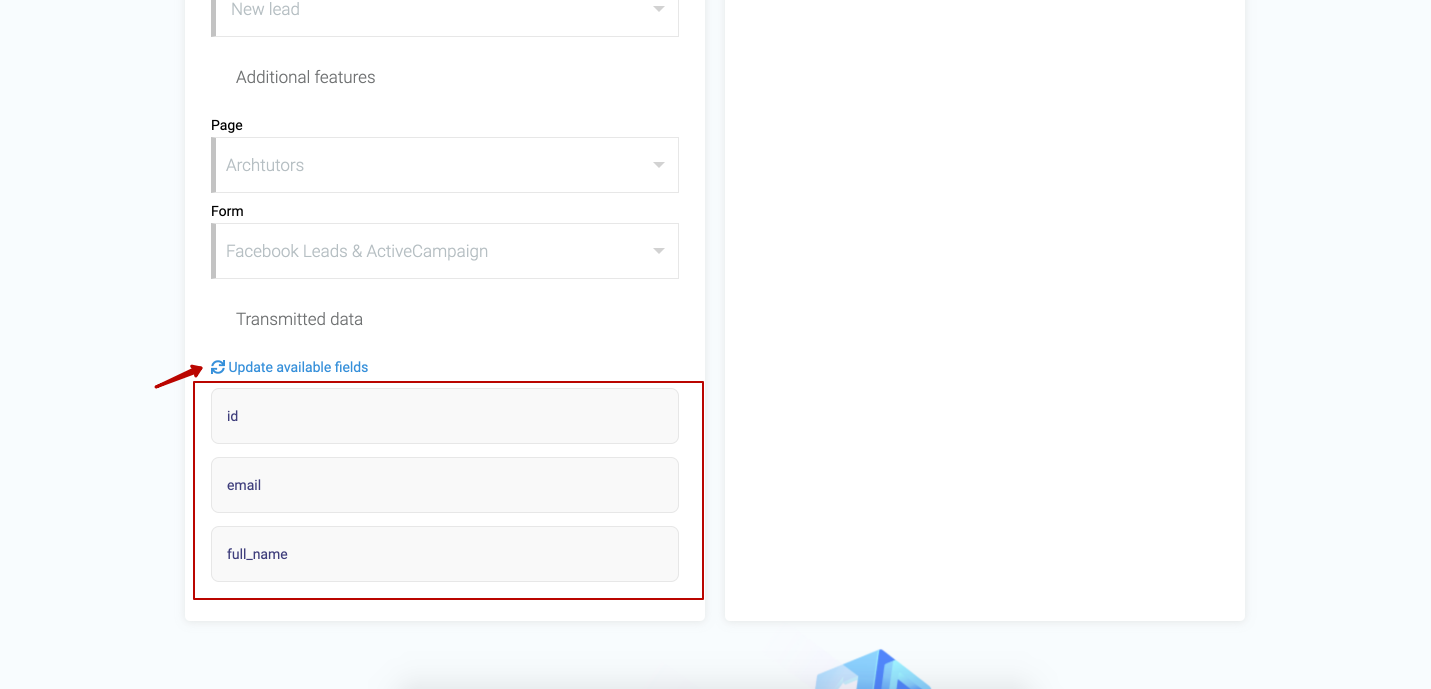
Return to the Apiway service and click the "Update available fields" button to see the data available to you.
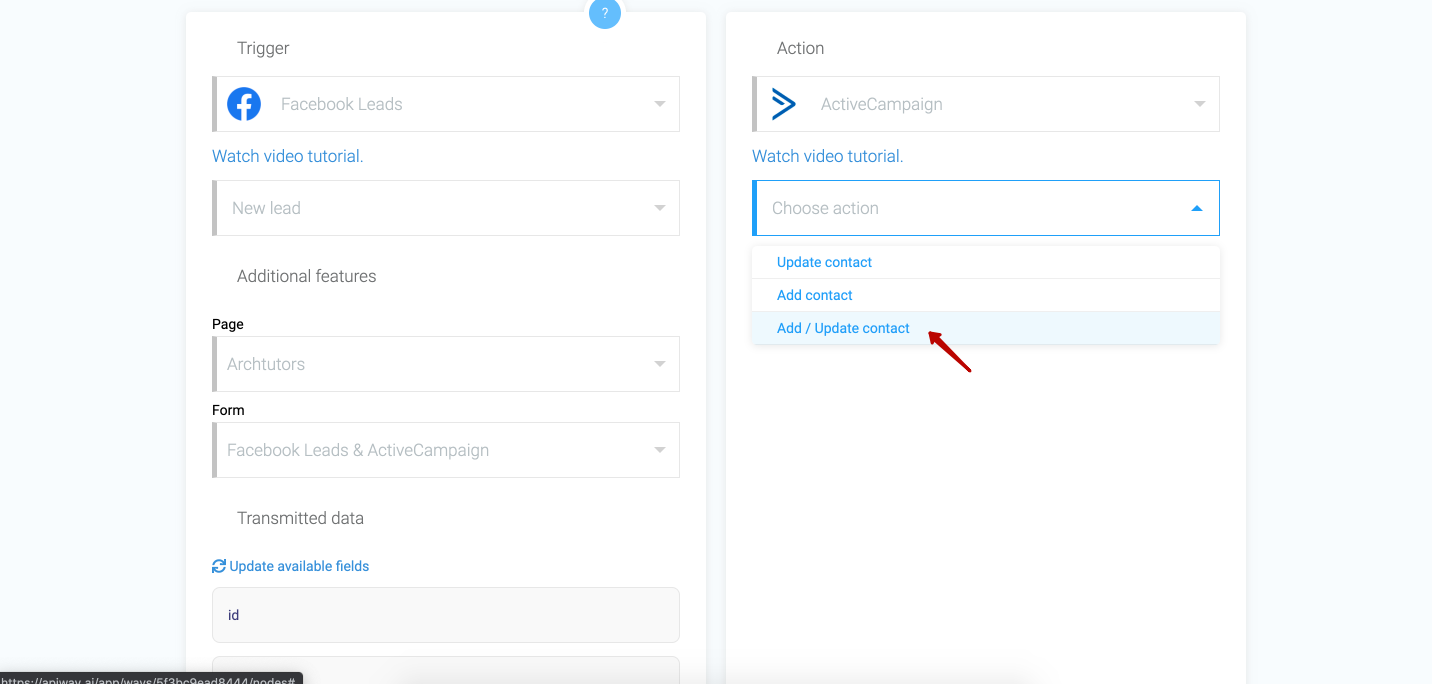
Let's continue. Go to the Action tab and choose ActiveCampaign.

Next, select one of the three actions.
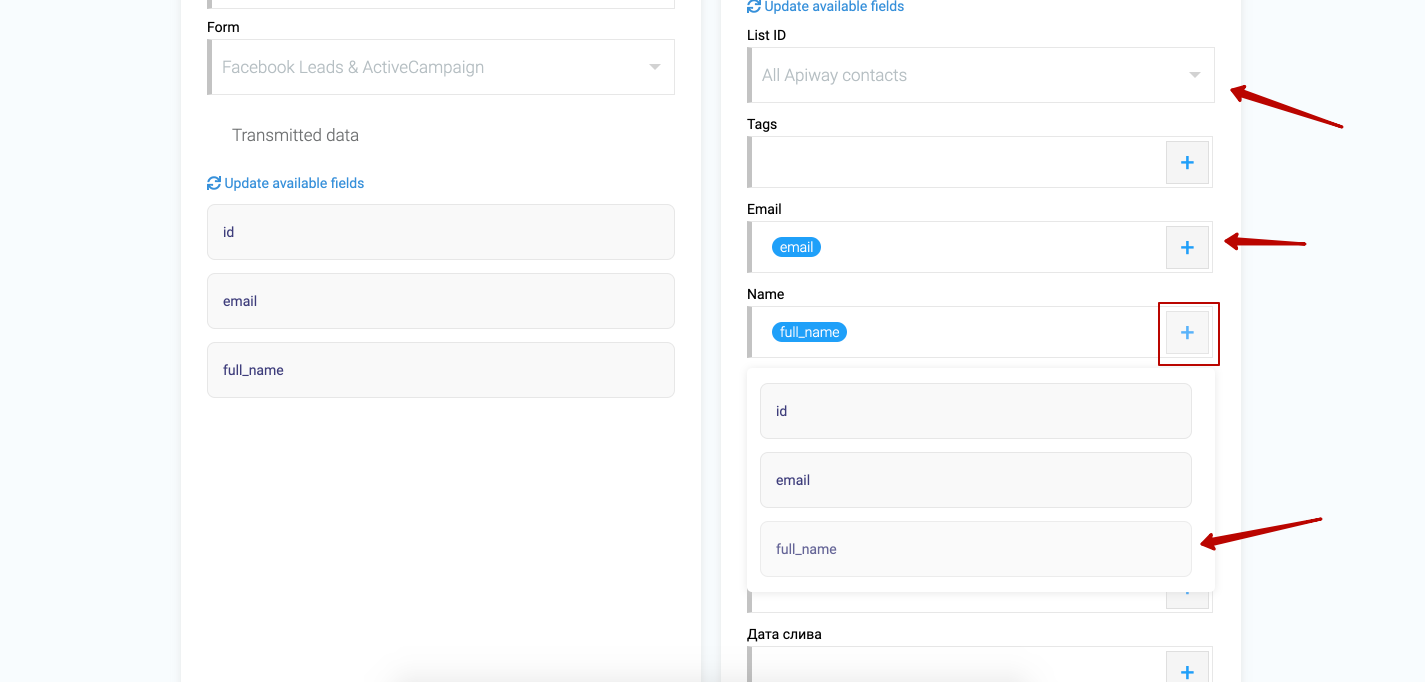
And click "Update available fields".
After that specify the list to which you want to send the data. Here you can have a lot of list, from which you can choose. Click the plus sign and choose "full name" for name, email for email and so on.
After that specify the list to which you want to send the data. Here you can have a lot of list, from which you can choose. Click the plus sign and choose "full name" for name, email for email and so on.
Now click Test.
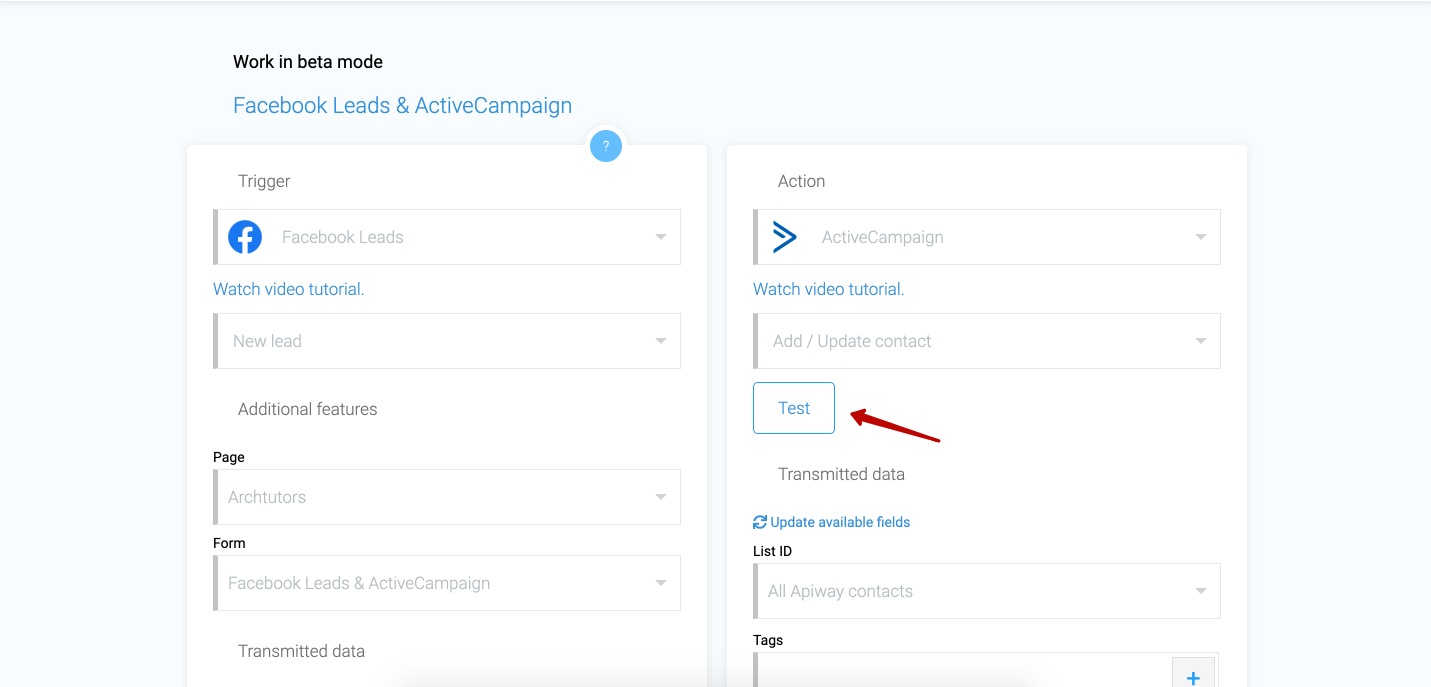
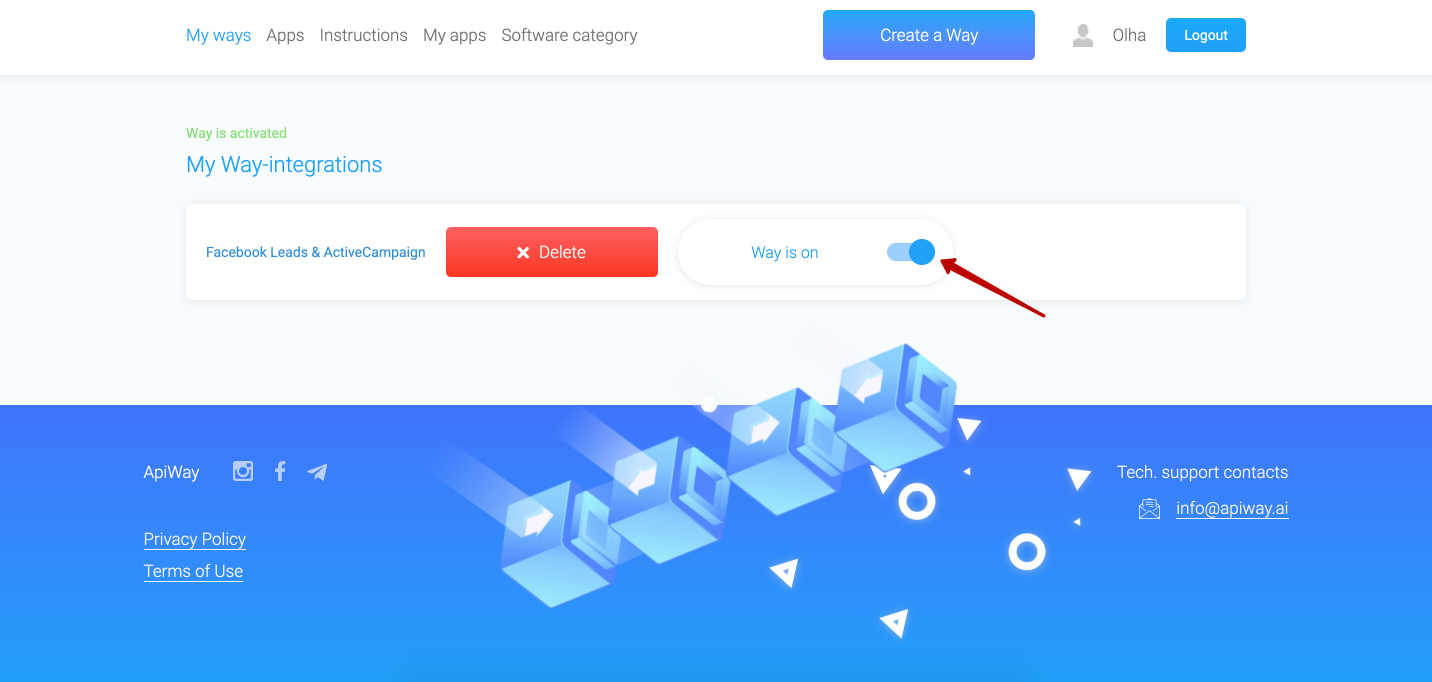
And then activate the integration.

If you want to edit this way, you can find it in the tab "My ways", deactivate it and change everything you need. But don't forget to activate it again.
Step 3. Testing the integration
Let's now test our integration. Return to the Facebook lead form testing tool. Now you should create a test lead one more time. First, delete it, and then create it again.
https://developers.facebook.com/tools/lead-ads-testing
https://developers.facebook.com/tools/lead-ads-testing
After you have clicked "create lead" go to your ActiveCampaign and check that the service receive the data of test lead which Facebook has sent.
