3 Simple Ways to Record Your Mac Screen
Using the Screenshot Toolbar
The Screenshot Toolbar on your Mac provides a convenient way to record your screen with sound. To screen record on a Mac with audio using the built-in Screenshot Toolbar, follow these steps:
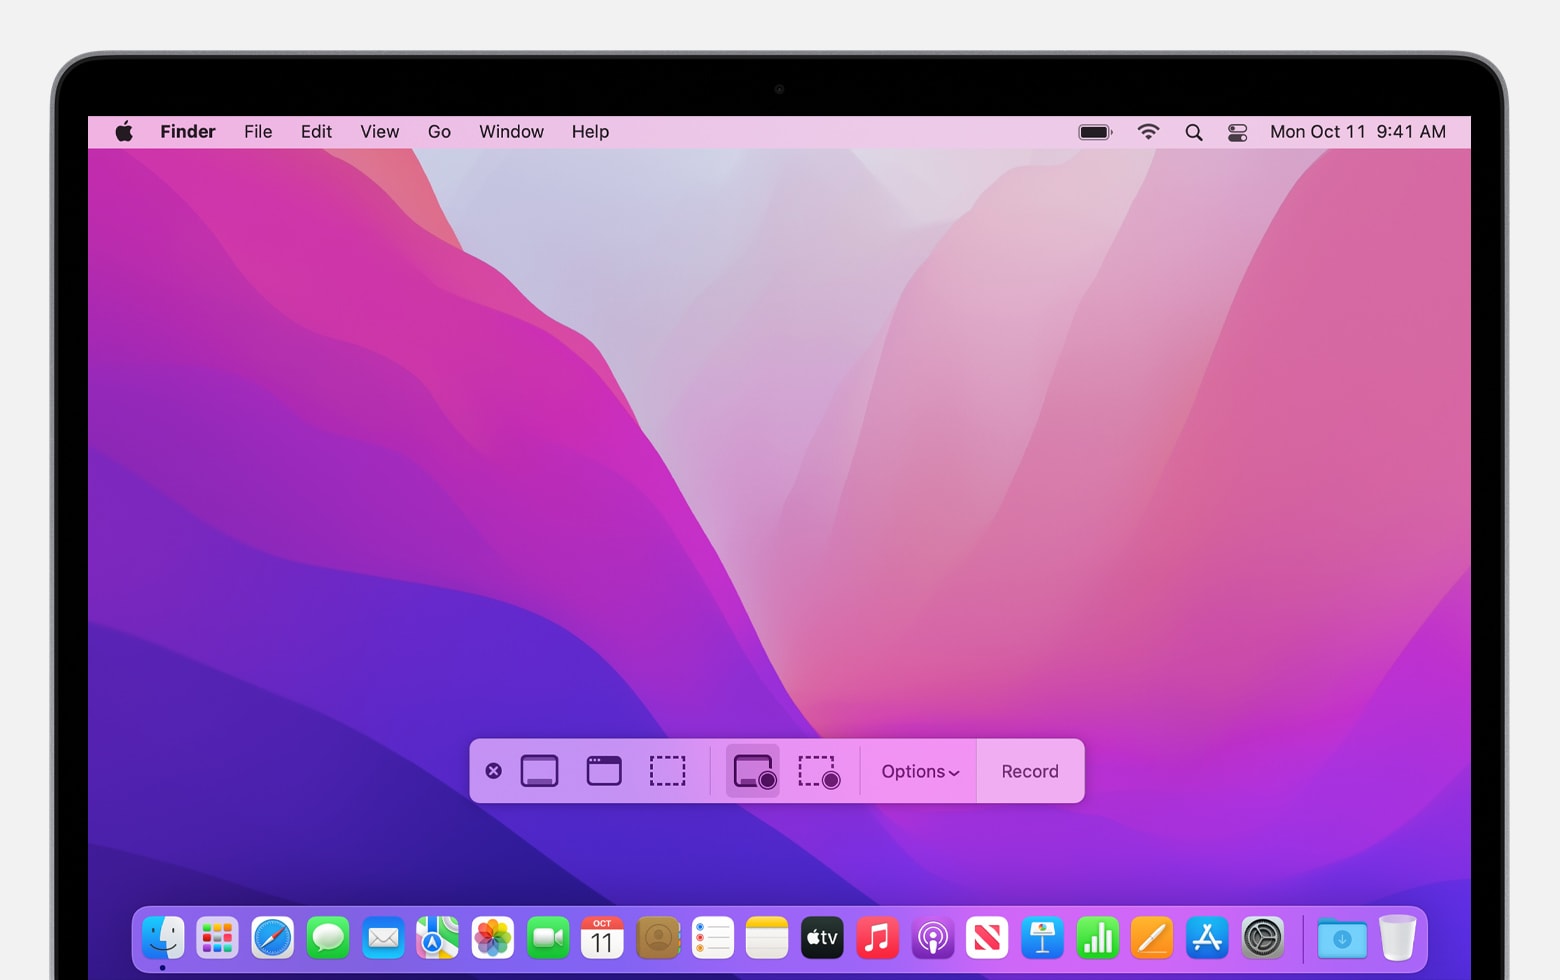
- Accessing the Screenshot Toolbar: Press and hold Shift + Command + 5 on your keyboard to bring up the Screenshot Toolbar at the bottom of your screen. This toolbar offers options for capturing your screen, including recording with audio.
- Selecting Recording Options: Within the Screenshot Toolbar, choose between “Record Entire Screen” or “Record Selected Portion” based on your recording needs. Select the appropriate option for the area you want to capture in your video.
- Configuring Audio Settings: Before starting the recording, click on the “Options” button within the Screenshot Toolbar. Ensure that the “Microphone” box is checked under the “Audio” settings to include audio from your microphone in the screen recording.
- Preparing for Recording: Declutter your desktop and close unnecessary windows or applications to ensure a smooth recording process.
- Starting the Recording: Click on the “Record” button within the Screenshot Toolbar or use the keyboard shortcut Control + Command + R to start the recording. A three-second countdown will begin before recording begins.
- Ending the Recording: Click on the “Stop” button in the menu bar or use the keyboard shortcut to end the recording process. The recorded video with audio will be saved to your designated location on your Mac.
While this method is easy and free, it may have limitations in audio quality and editing capabilities.
Using QuickTime Player
QuickTime Player, known for playing media files, also features a screen recording function. Follow these steps to record your screen with QuickTime Player:
- Opening QuickTime Player: Launch QuickTime Player on your Mac from Spotlight or the Applications folder.
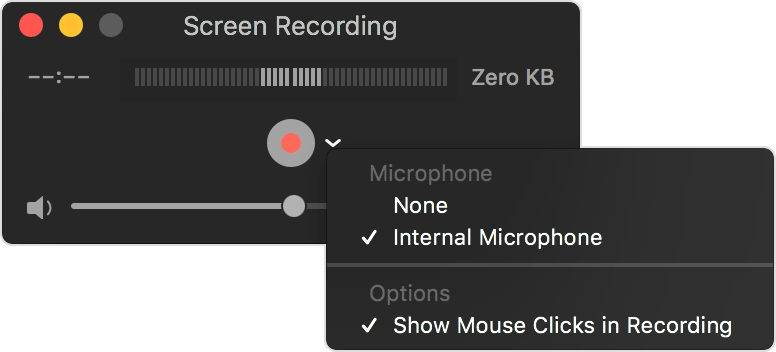
- Starting a New Screen Recording: In QuickTime Player, go to the top menu, click on “File,” and select “New Screen Recording” from the dropdown menu to open a screen recording window.
- Selecting Audio Input: Within the screen recording window, choose your audio input source, such as “Internal Microphone” or an external microphone for voice recording.
- Choosing Screen Area: Click on the screen to select the area you want to record, whether the entire screen or a specific portion.
- Starting the Recording: Click the “Record” button in the screen recording window to begin capturing your screen activity with audio.
- Ending the Recording: Click on the “Stop” button or use the specified keyboard shortcut in QuickTime Player to save the recorded video with audio to your desired location on your Mac.
Using Movavi Screen Recorder
For advanced features and customization options, consider using third-party screen recording software like Movavi Screen Recorder. If you want to know how to screen record on iMac with Movavi Screen Recorder look at the steps below:
- Download and Install Movavi Screen Recorder: Visit the official Movavi website to download and install the software on your Mac.
- Launch Movavi Screen Recorder: Open the application from your Applications folder or dock icon.
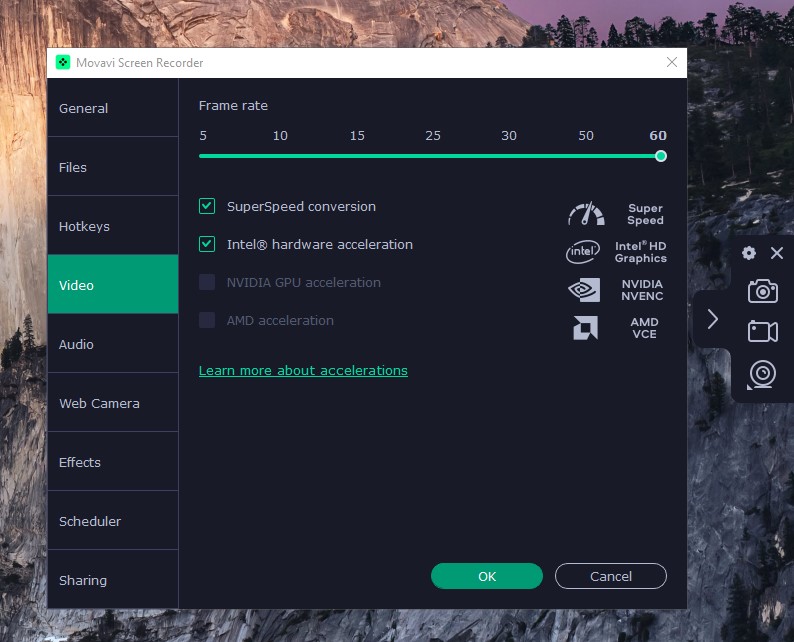
- Set Up Recording Parameters: Adjust recording settings, including screen area, frame rate, and audio input.
- Select Audio Source: Choose your audio input source within Movavi Screen Recorder.
- Adjust Recording Settings: Customize video quality, output format, and hotkeys for recording control.
- Start Recording: Click the “REC” button to start the screen recording process.
- Finish Recording: Click “Stop” within Movavi Screen Recorder to save the recorded video with audio to your specified output folder.
Conclusion
Recording your screen on a Mac with audio is now easier than ever. Choose the method that suits your needs best and start creating your screen recordings today. Whether for personal or professional use, these tools make screen capturing a breeze. Unleash your creativity and give it a try!


 Articles — Personal productivity
