Sign in
Sign up

Basically, today we’re going to talk about Facebook and Instagram ads automation.
So, you started lead generation ads on Facebook through Facebook lead forms.
Now every time a lead comes you have to go to the Facebook platform into the lead form, download the sheet, get these leads, and then send them to your sales or contact them yourself.
So, it’s a very long process, as you see. What if there’s a way to automate this whole process?
And whenever Facebook captures a lead it comes directly to Google Sheets.
That is what we’re going to talk about today.
In fact, the process I’m going to show you is completely free, it will cost you nothing.
So, let’s get started.
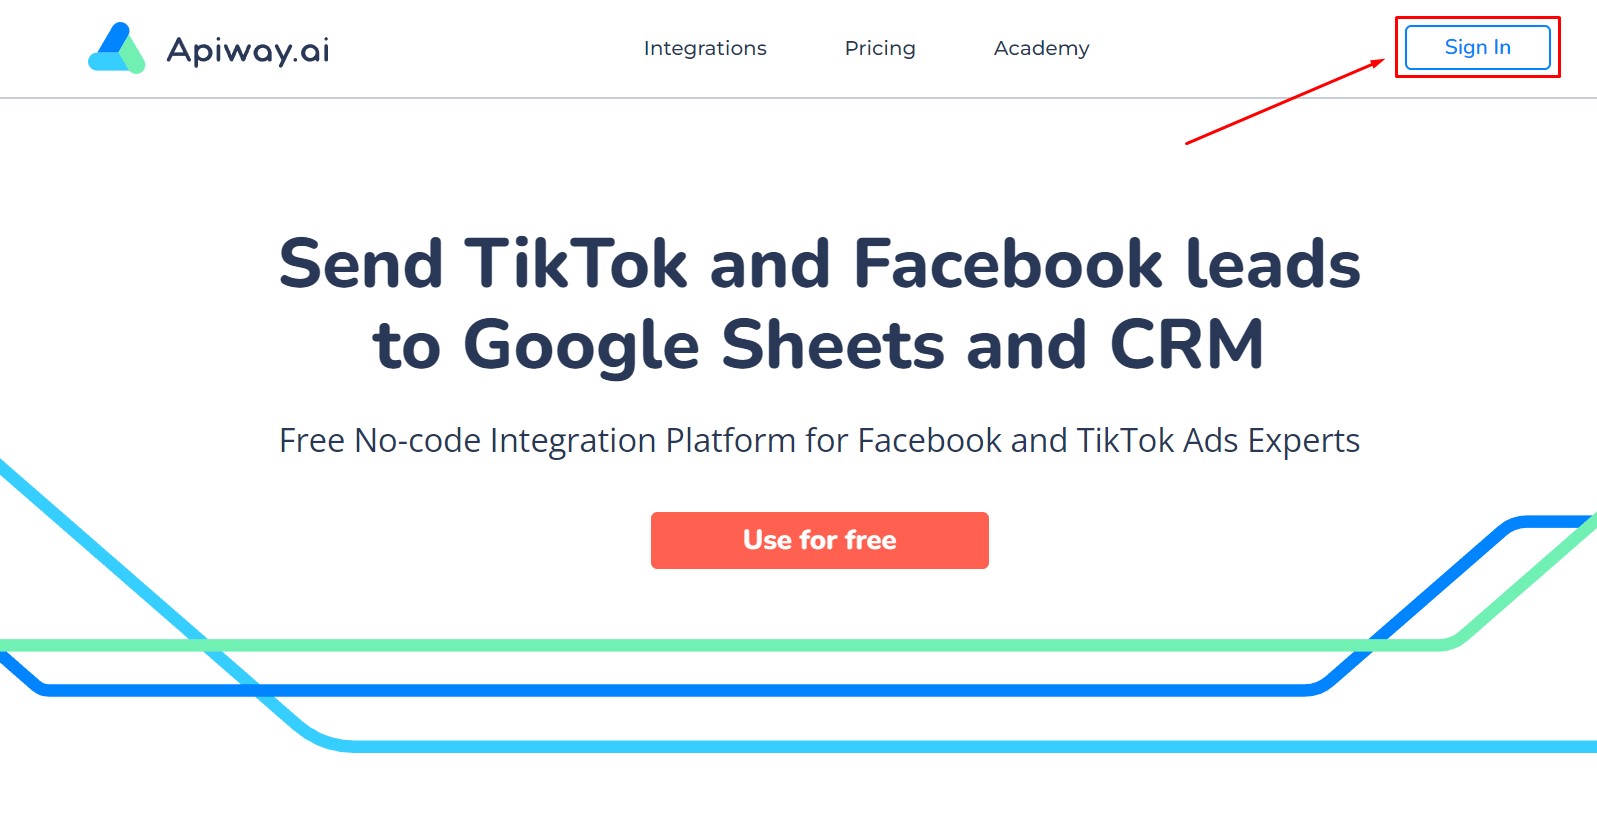
First, you need to sign up or sign in to Apiway.
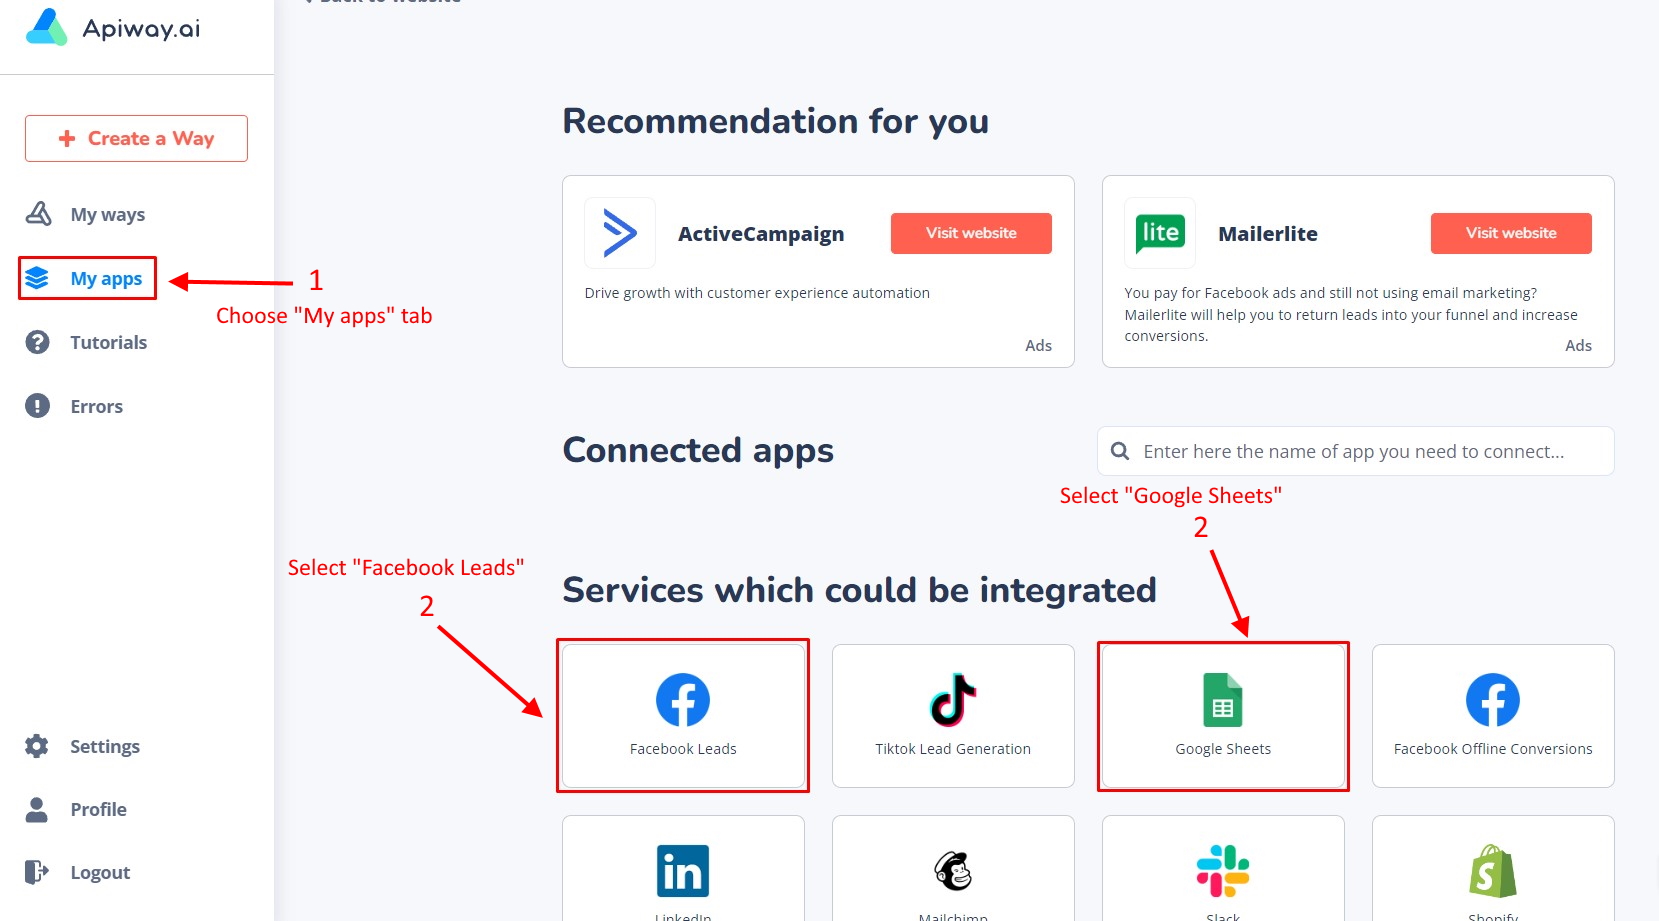
After you’ve done this, go to the tab “My apps” (1), and here find and add Facebook leads and Google Sheets (2).
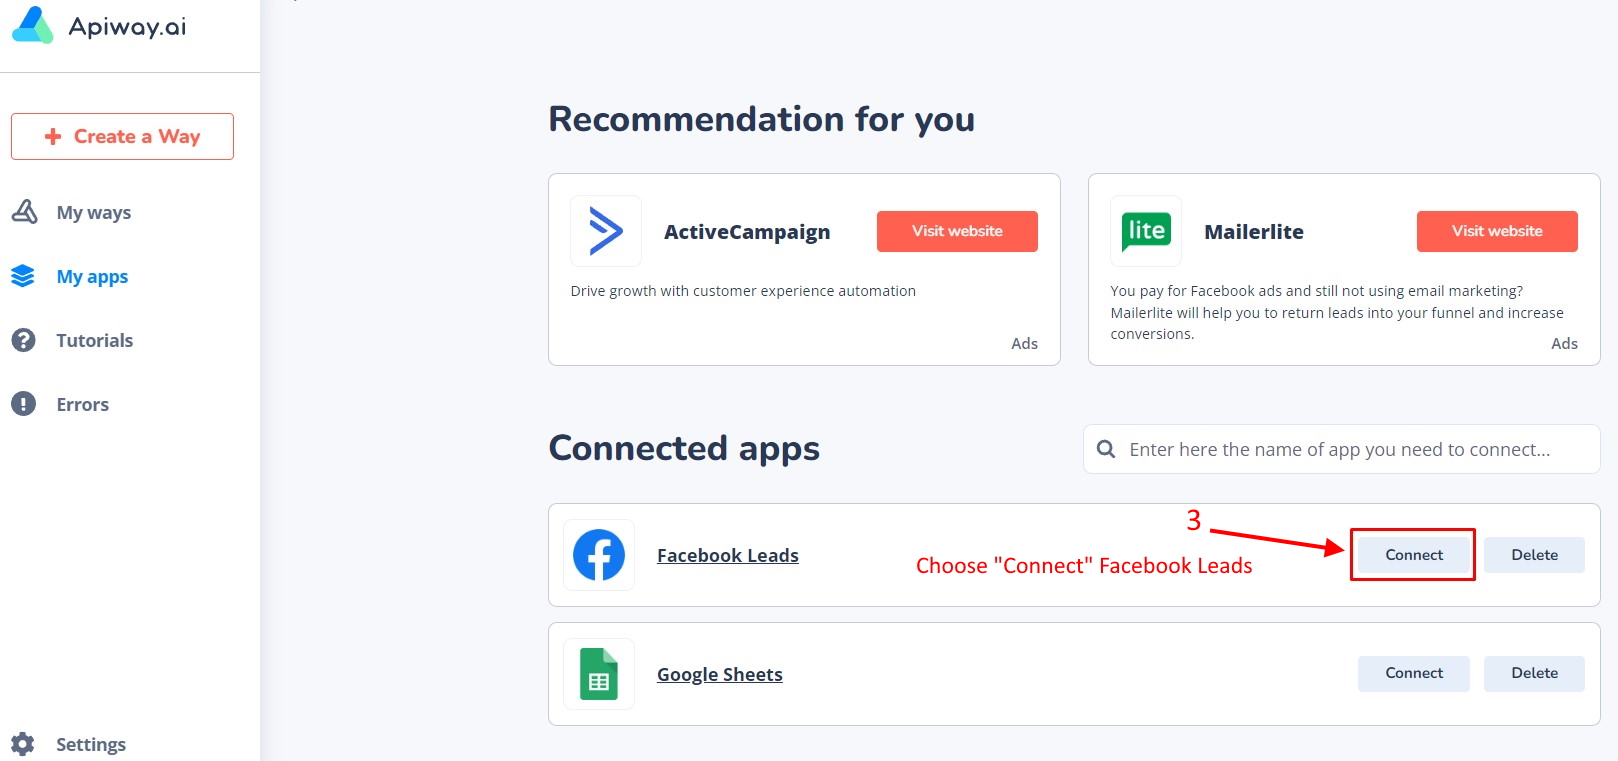
Now you should scroll up and connect them to your accounts. Let’s start with Facebook.
First, pay extra attention, if you’re not a Facebook Business Manager Admin, and do the automation for your client or employer make sure you are granted full access rights to the page on which the lead form is done.
Unless you have all access rights the integration won’t work.
You can find more info about it in this article.
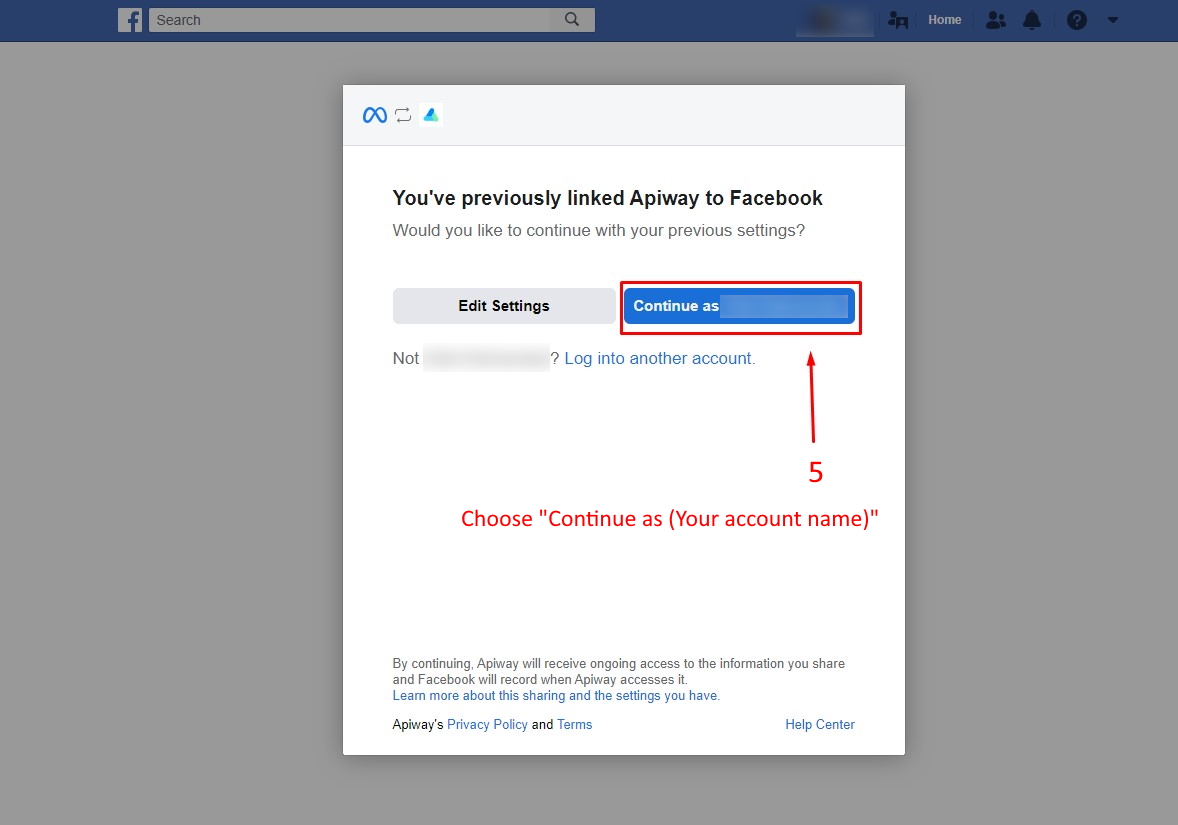
Click on the “Connect” button (3), and one more time (4), and then choose which account you want to connect(5).

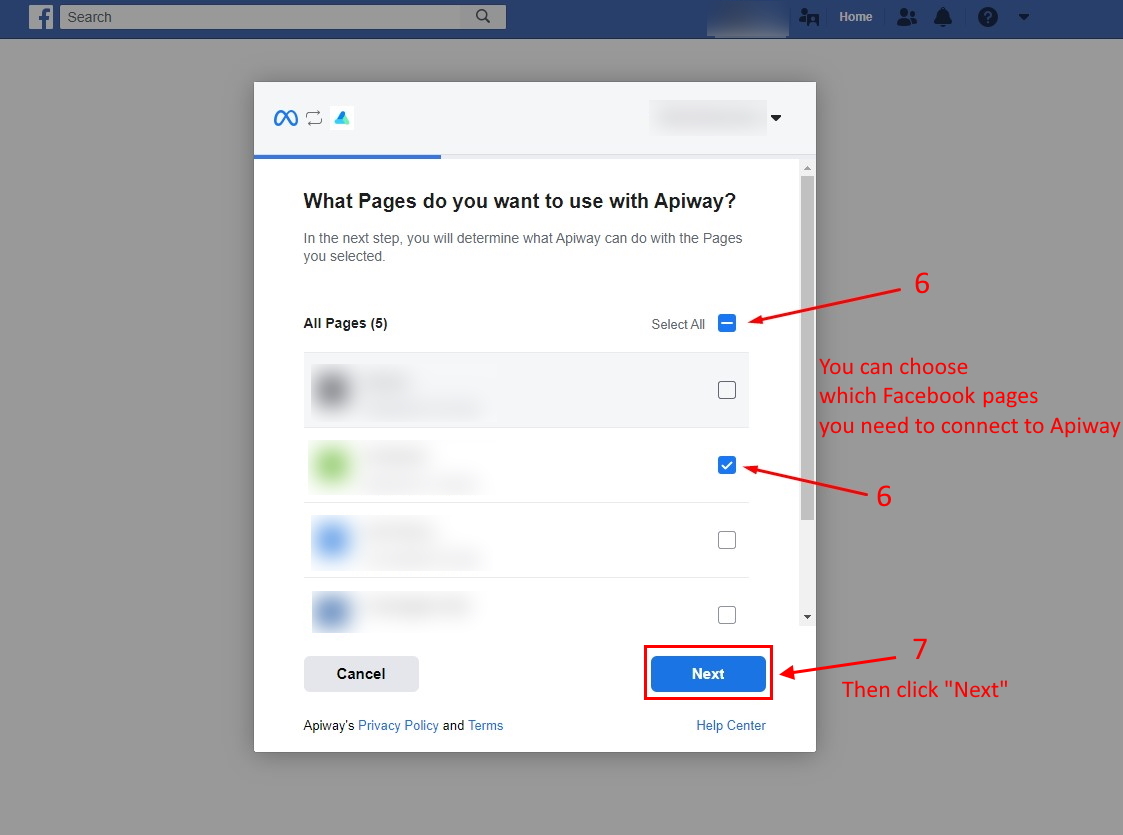
Here you need to choose business pages(6) and then click “Next”(7).
And next give Apiway all permissions (8), because as you can see it may not work properly if you turn some of these off.
Then choose “Done” (9).

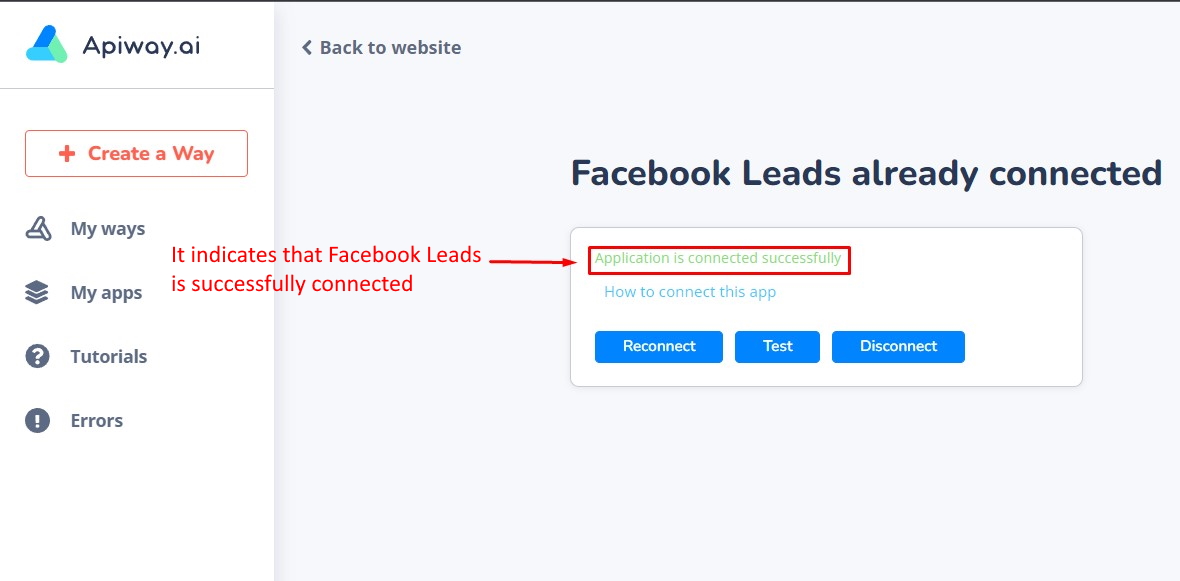
Now you can see this green text. It means that all is correct and Facebook is successfully connected.
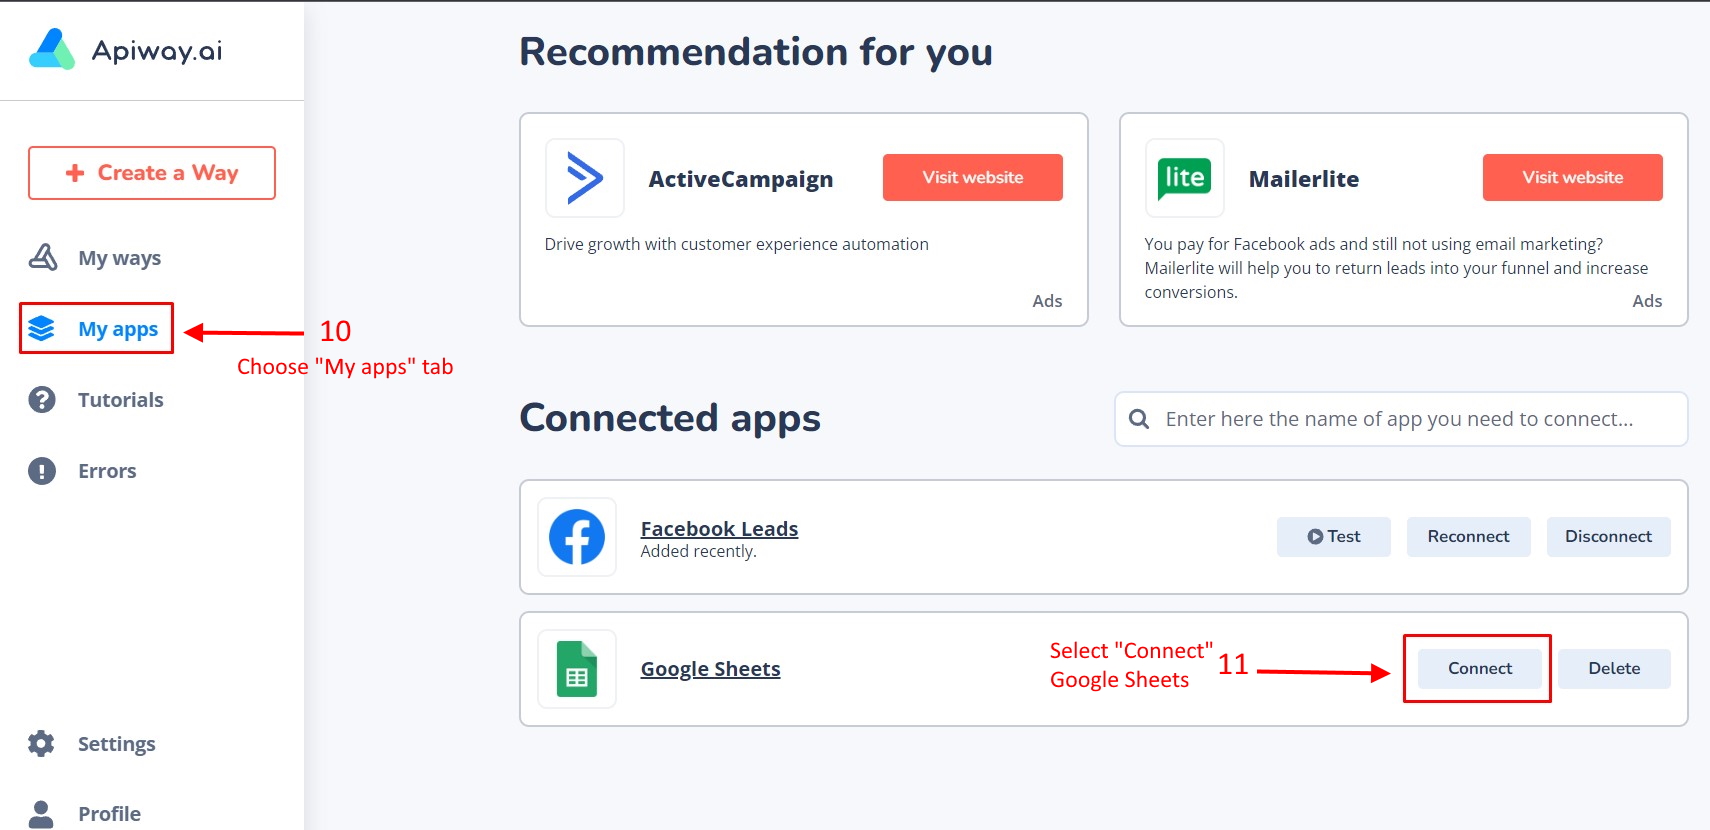
Now let’s do the same for Google Sheets. Go back to “My apps” (10), and click the button “Connect” for Google Sheets (11).
On this page, you should choose which Google account you want to connect (12).
Pay attention, you need to select the Google account on which Google Drive contains the sheets you need.

Here you need to give Apiway full access (13). It doesn’t collect your data, it just needs these permissions to be able to edit the files in order to add leads to the spreadsheet.
Please pay attention and don’t miss it, or your integration won’t work.
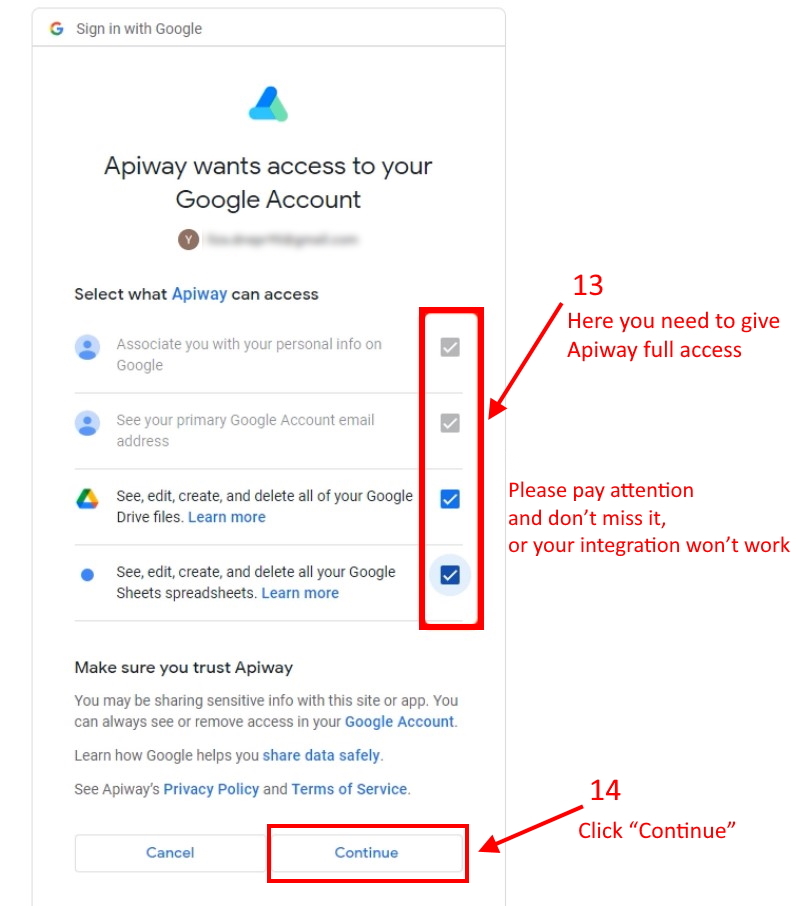
As you tick all click “Continue” and it returns you to Apiway (14).
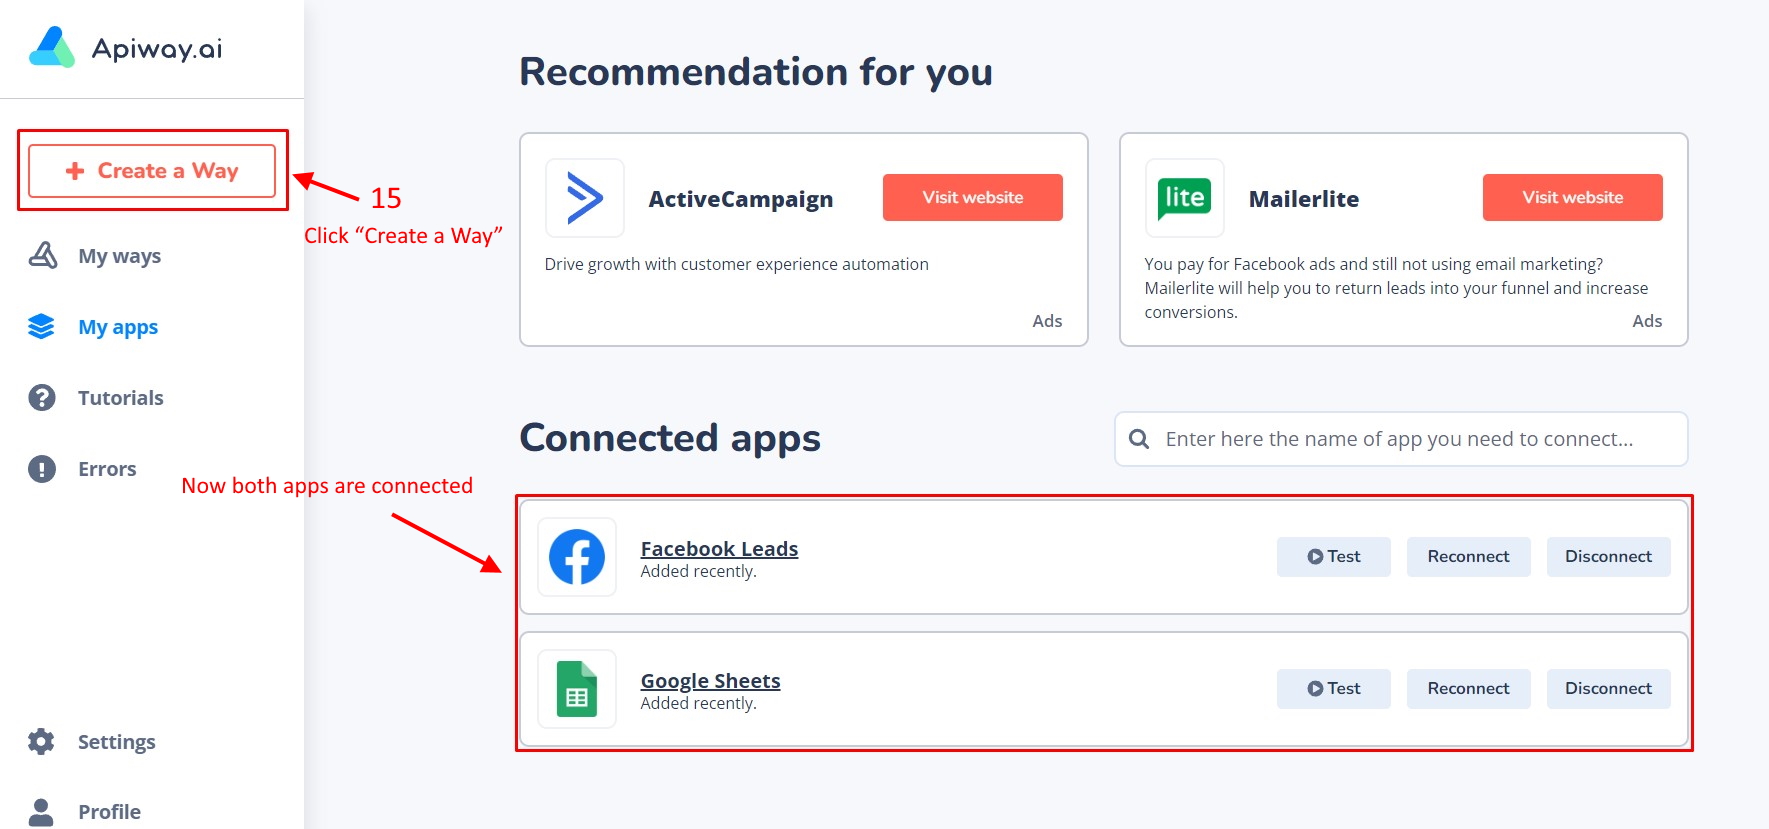
Now both apps are connected.
So we can start to configure the integration.
Click “Create a Way” (15).
You can give it the name which you need (16). For example Facebook and Google Sheets.
Here you can see the field trigger. Here select Facebook (17). For the action field select “New lead” (18).
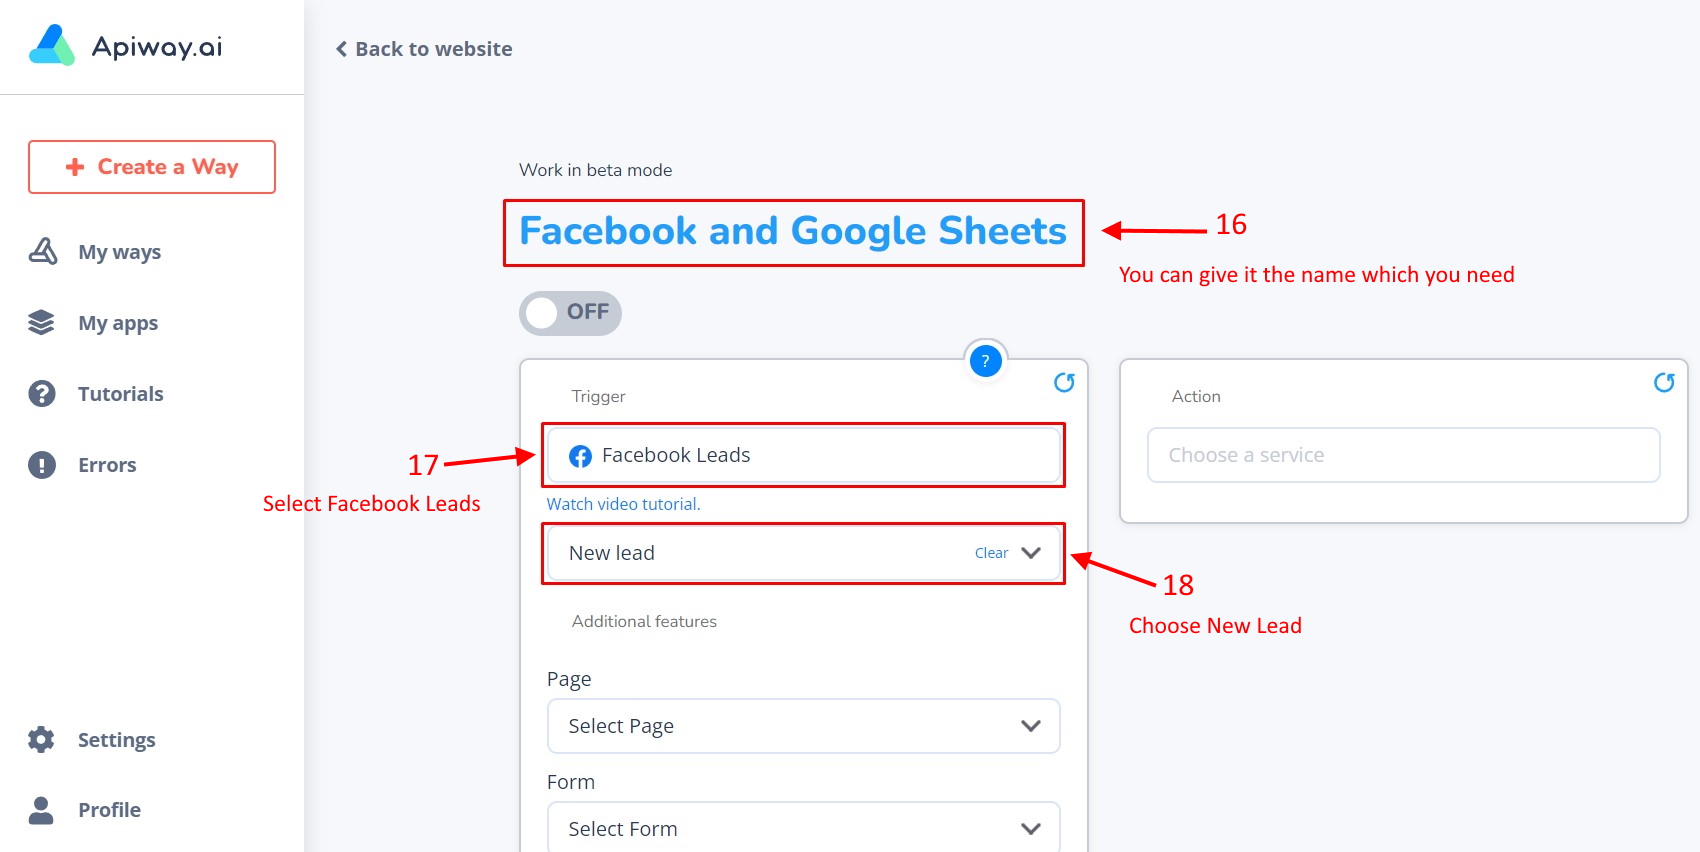
So, when somebody fills in the lead form it will trigger the integration to work.
I created a lead form in advance.
I hope you already know how to do it.
If not, you can watch our video about it on the link below, or easily find other videos on YouTube.
So I choose a page (19) and a lead form (20), which I want to get leads from.
And then click “Update available fields” (21), and there’s nothing here, I only can see the “No data” message.
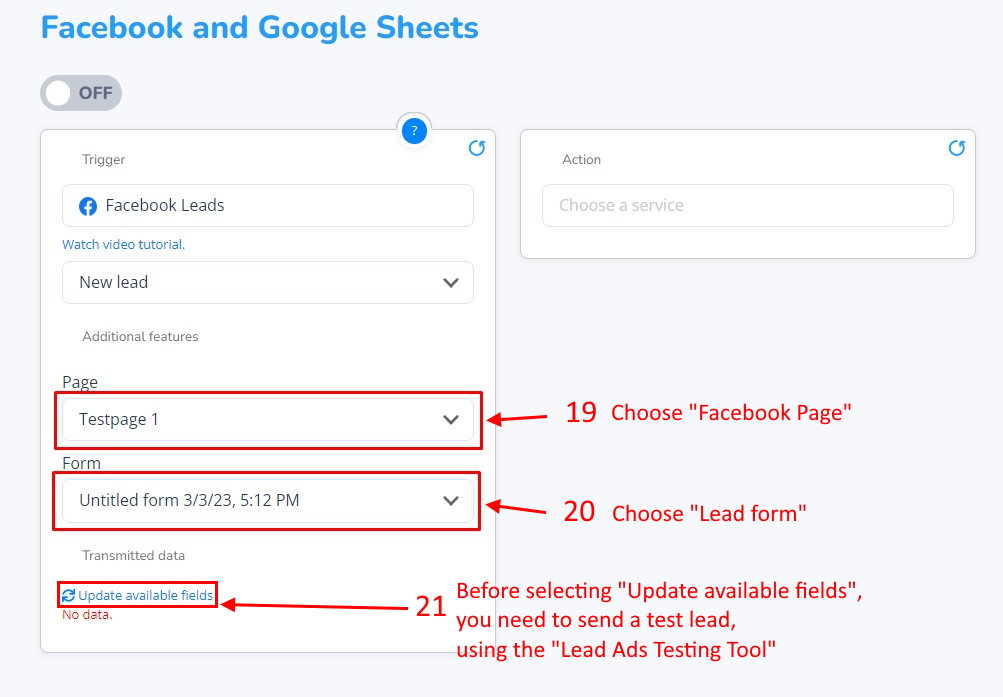
To fix this and get your form field you need to take the next steps:
Search in Google for “Facebook lead form testing tool” or use this link:
https://developers.facebook.com/docs/marketing-api/guides/lead-ads/testing-troubleshooting/
It’s a standard Facebook tool. Go to this page, and here in the first sentence, there’s a link to the tool itself, as on the screenshot below.
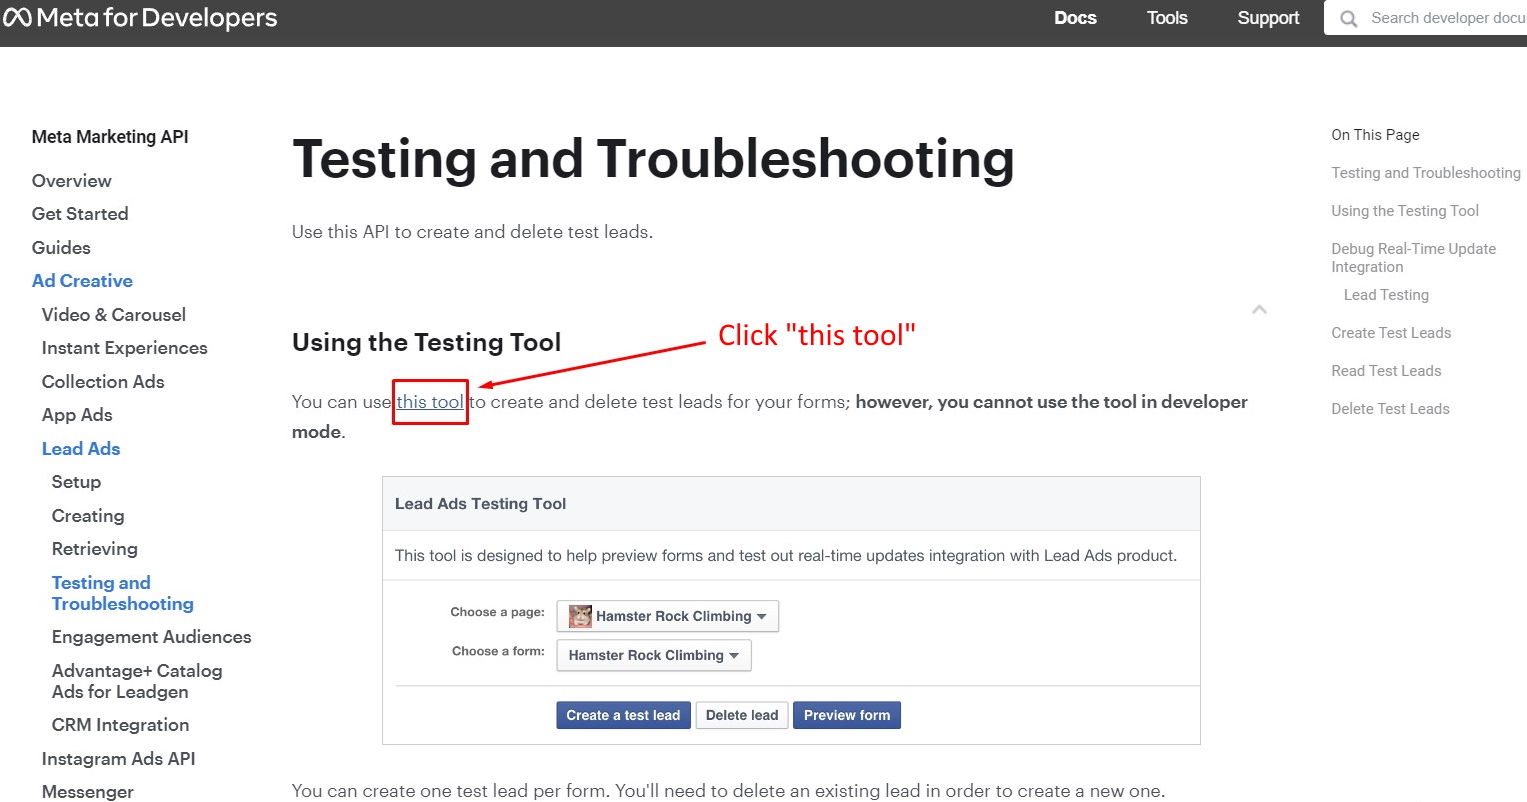
Click it. This tool simulates the leads coming.
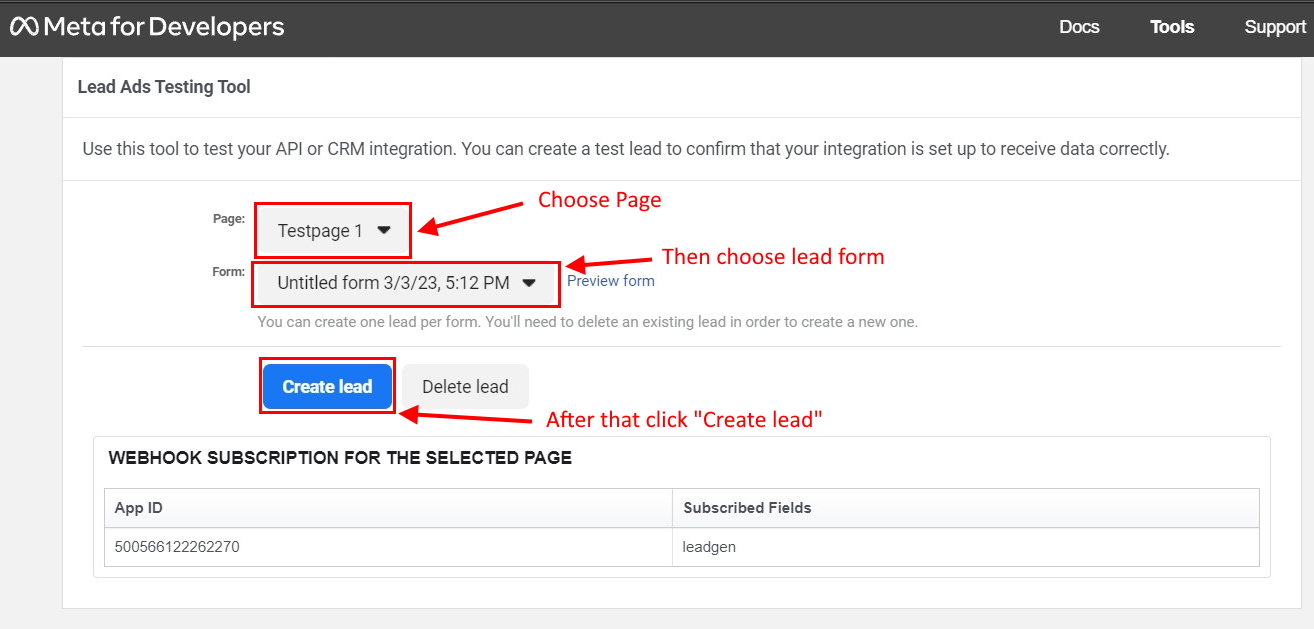
Choose the page and the lead form which you chose in Apiway and then click the button “Create lead”.
After that return to Apiway and click “Update available fields” again.
Now you can see that the data has appeared. You can create different fields, and they, of course, all will be here.

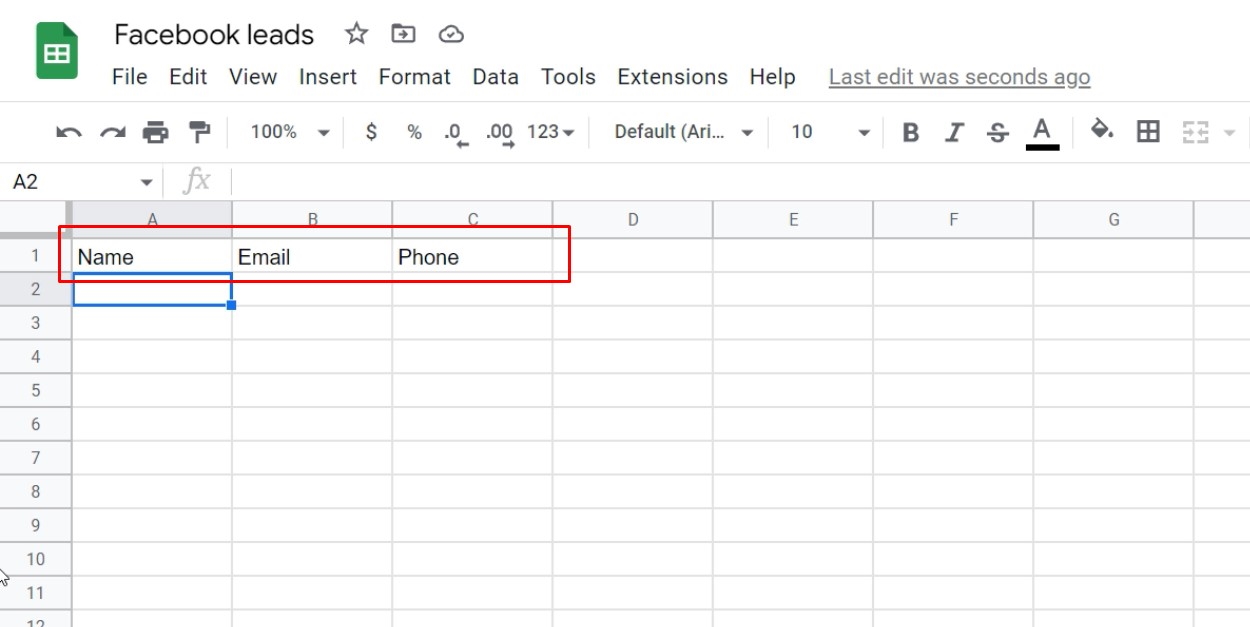
Also, I’ve created a spreadsheet with the name Facebook leads. In the first row, I’ve given names to three columns.
Name, Email, and Phone number, as on the screenshot below.
Returning to Apiway again, now you should specify the action.
In the field “Choose a service” choose Google Sheets (22).
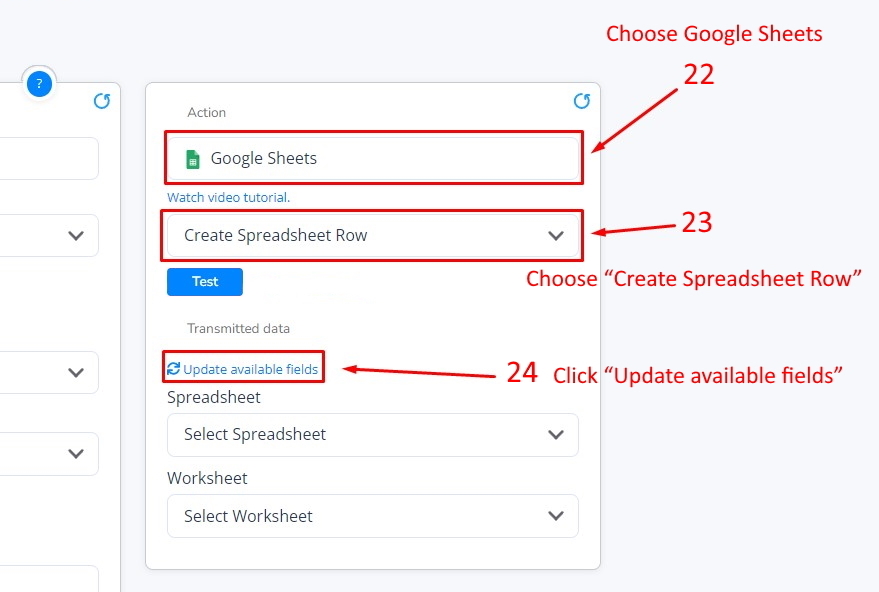
Here choose “create spreadsheet row” (23). It means, when you get a new lead, the system will fill in the rows in the sheets with information.
Then click “update available fields” (24)
First, select the spreadsheet that you need (25). Then select a worksheet (26).
Here you can have a lot of worksheets, but you have to choose one, to which you want to add information. For me, it will be "sheet 1".
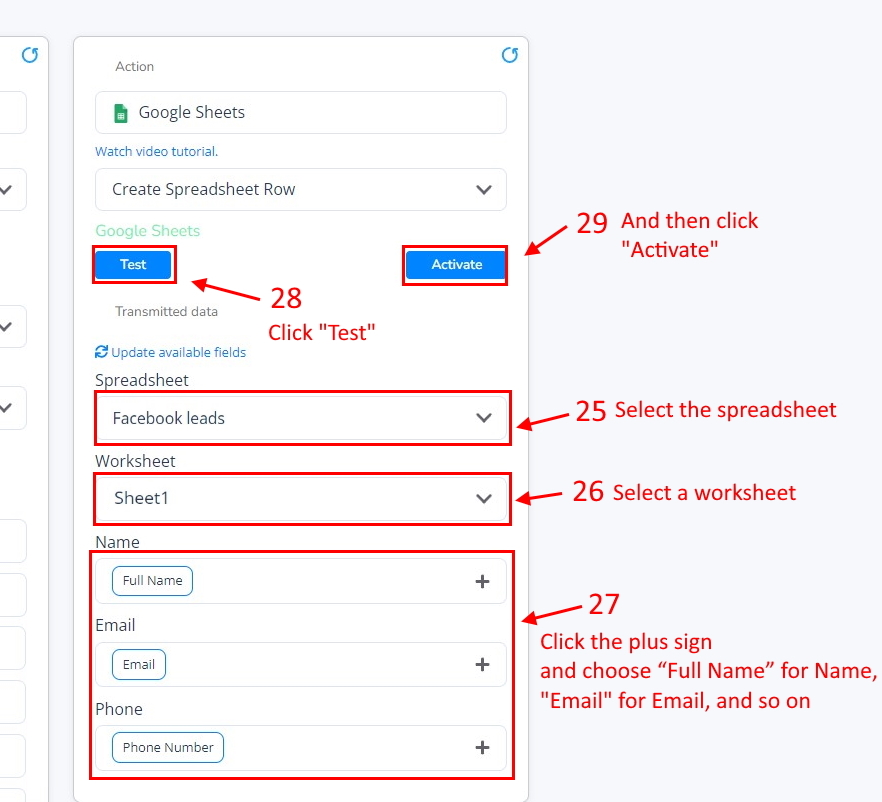
And the Apiway shows you the fields, which you have in your sheet. If there’s only one here, just give names to the columns, as I showed you.
Here click the plus sign and choose “full name” for name, email for email, and so on (27).
Then click “Test”(28) and “Activate”(29).
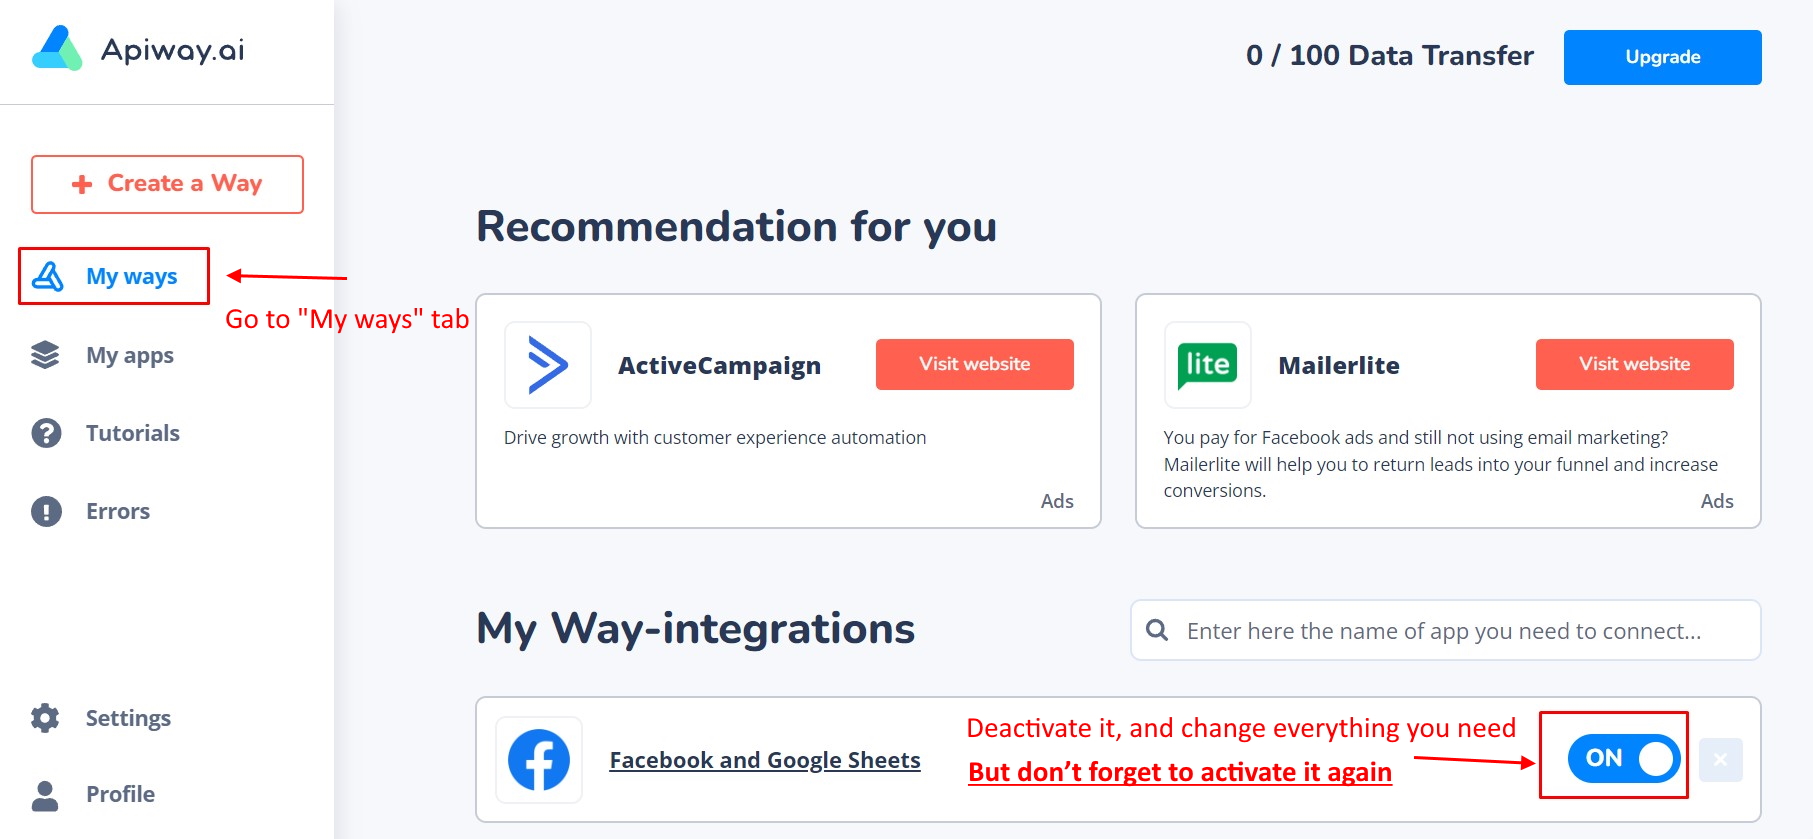
If you want to edit this way, you can find it in the tab “My ways”, deactivate it, and change everything you need.
But don’t forget to activate it again.
Now let’s create a test lead one more time to check if everything works.
Go to “Facebook lead form testing tool”, you can use this link:
https://developers.facebook.com/tools/lead-ads-testing
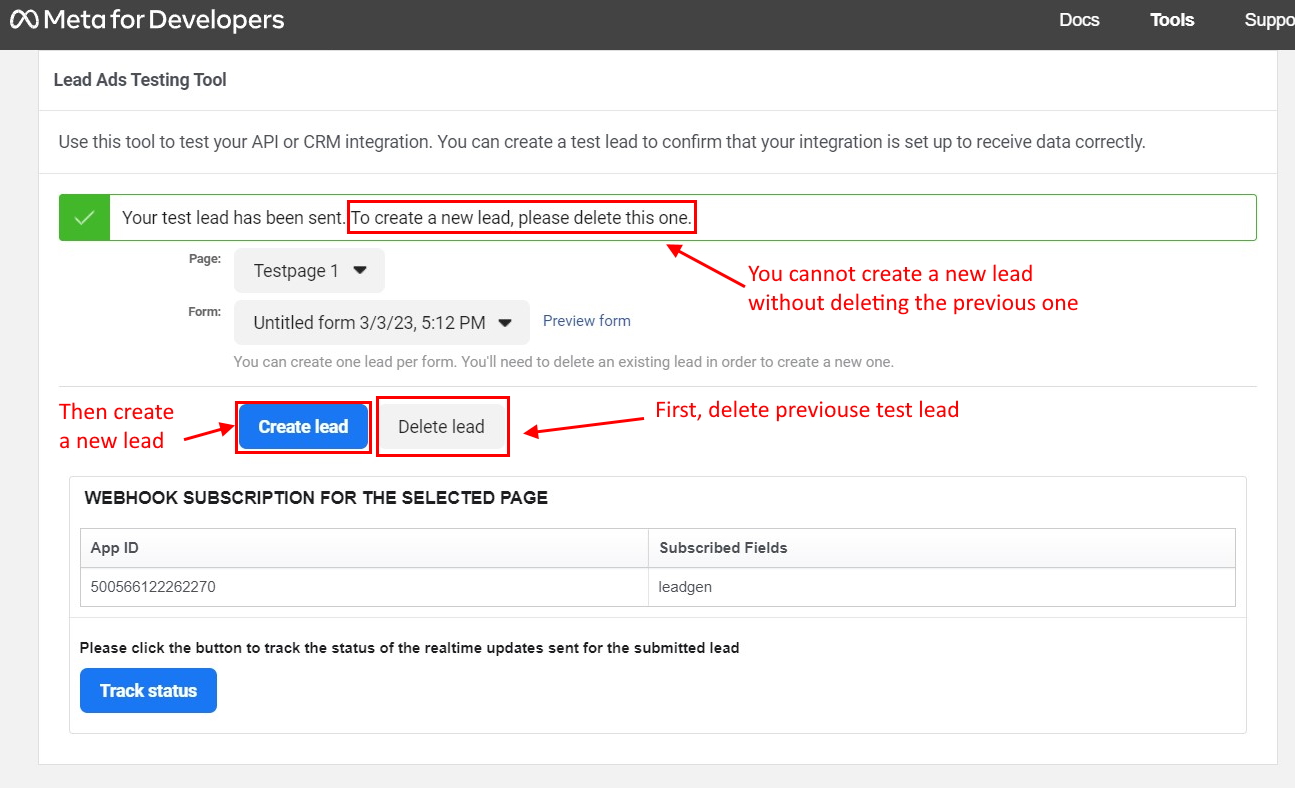
First, delete it, and then create it again. You cannot create a new lead without deleting the previous one.
Now I’ll go to Google sheets. Data transfer may take a little time. Sometimes it appears immediately, sometimes you have to wait for a while.
The time of waiting is up to 15 minutes but usually, it comes almost immediately.
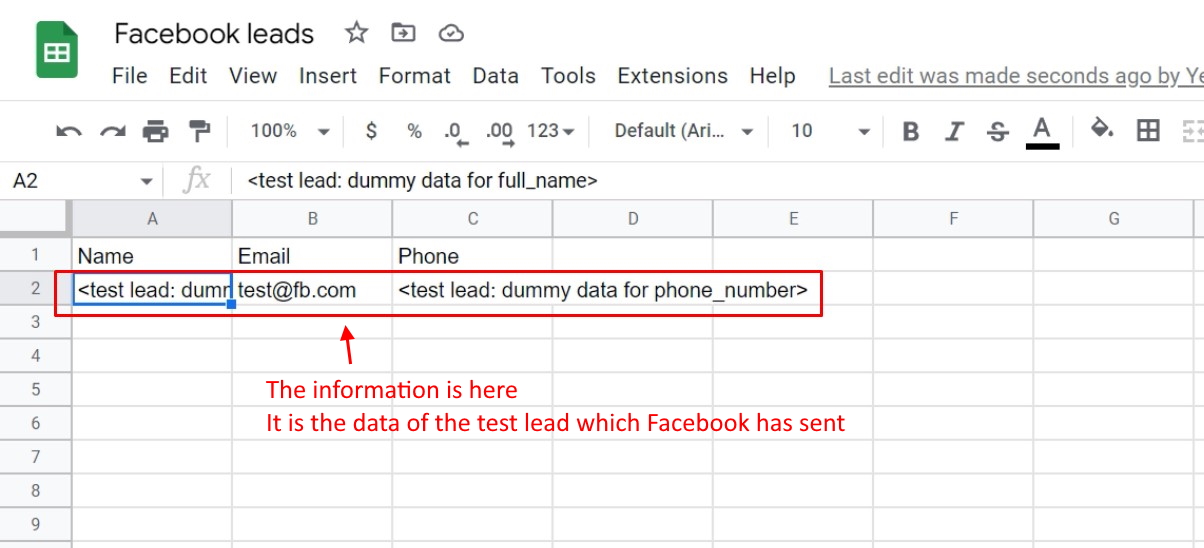
And you can see that the information is here. It is the data of the test lead which Facebook has sent. Name. Email. Phone number. So, new leads will appear in rows below, filling in the sheet.
This way, you can easily make integration and automate your work, and make your business process better.
 Articles — Other

You have reached the maximum per-minute rate limit.
Try again in one minute.